Friday 30 September 2016

Monochromatic Hobby Art Poinsettia

Hello again crafters, wow how these Fridays come around so quickly.
Today's card has been done with the Hobby Art Poinsettia in a black and white theme.

I took a 7" x 7" white card and matted it with plain black card , then I cut a slightly smaller piece of the Super Smooth white card and using Versafine Black Onyx ink I stamped the poinsettia images as seen below then clear embossed.


I wanted to create a poinsettia background just using Versamark &  Wow Bright White Embossing Powder, so masked off all three images using Mask-it then started to randomly stamped the large poinsettia stamp over the masked images.


Once the first layer was done, I removed the mask from the large image an replaced it over some of the white embossed areas so I could do the same again to fill in the gaps you can see in the above picture :o)


Once all that was done, I wanted to decoupage the black outlined images so stamped onto black card using clear Versamark and embossing with Wow Bright White and stamped the images again on to white card using Versafine Black Onyx and Wow Clear Embossing Powder.  I then cut out the images as I wanted them layered onto the images.


Next was the sentiment, I used the Merry Christmas stamp from the same set and stamped onto some Super Smooth white card, quite a large piece so I could cut it down to fit the card, then masked the sentiment with a pieced of Mask-it then randomly stamped the large poinsettia over the image and embossed. 


 I then cut it down to the size I wanted then backed it with a piece of black card.

Then I built up the poinsettias forming them as I stuck them on and glued small gems in the centre of each poinsettia.


Thank you for dropping by the blog today and I hope you enjoyed it.
Love Jan -x-


Thursday 29 September 2016

Daryl the Quirky Turkey - and Friend!


September is nearly over! The nights are drawing in and I have been hoarding for Christmas. I always forget what I have bought though, and often where I have put it all!

For this week's card featuring Daryl the Quirky Turkey from Hobby Art, I have chosen the Daryl that I think looks like he is fleeing the scene, along with a stunned friend looking on! 

As always when I start using a stamp I need to colour, I began by stamping the image using Staz On Jet Black Ink and playing with colours. This time I used Spectrum Aqua Pens as they have such vibrant colours, but these can also be toned down for shading (at the moment Lisa only has a few sets left at UNBELIVABLE prices (25% off), so grab them HERE!) Once I was happy with the colouring and shading, I used the fine tips to add more specific detail to the feathers etc. I then created a 'master' Daryl and saved this for future use together with the stamp set.

Now to start to make my scene. I cut a piece of Super Smooth card to the topper size I wanted, allowing for the matts and layers I was going to use. I stamped the turkeys and then created some masks for each one using a sticky note.


With the masks in place, I was able to use them to add a background scene. Using a torn piece of paper, I started to add some sky using some Tumbled Glass Distress Ink, an Ink Blending Mat and Blending Tool.


Once the sky was in place, I used Mowed Lawn Distress Ink to stamp the tree stamps from the set into the background.  I then masked the sky and added the land part with some Tea Dye Distress Ink. With the turkey masks still in place, I used the fence stamp to add some depth and the small grasses in the foreground. It did not matter that my fence intruded into the land area, as I was going to colour it in anyway.


At this point, I decided that I did not like the scene I had created. Brown hills? Not very Christmas I thought, more like early Spring! Back to the drawing board and this time I left the hills white, using my torn paper to mask and allow me to add some trees behind. Much better!


Once the fence was added, I removed the masks to reveal my turkeys standing in a Christmas scene. The little grass detail stamp finished it off.


Using the colours I had practised with, I coloured my turkeys in.


For the next section, I followed the same technique I used in my post from last week, creating baubles and threading them through Daryl's feathers and securing behind. I also stamped and coloured the holly leaves and added a Christmas hat from another Hobby Art set (with the grumpy sheep on!). I wanted to add some speech for my characters, so I decided to make my own signpost and speech bubble. Using the sign in the set as a guide, I stamped the Merry Christmas sentiment (from a set I had in my stash) onto some paper and drew the signpost outline freehand. I cut this out and slotted into Daryl's feathers to make it look like he was carrying it. The speech bubble I created on my PC, again stamping a sentiment into it and sticking into place with Cosmic Shimmer.


Once the words were in place the card was almost complete, but I decided the sky needed some detail, so I added some stamped snowflakes. I also used a Zig Glue Pen to add Crystal Glitter frosting to the fences, sign and ground.


There you have it; Daryl in complete incomprehension at his friend's Christmas excitement! (not surprising really!)

I think this is my favourite card so far; I like the idea of the turkeys having zany personalities. I hope they do not put me off eating my Henrietta this year though (we always call our turkey that!)

That's it for today folks, see you next week for the last Daryl card from me.

Love, Martina
xx


Daryl the Quirky Turkey Super Smooth White    Tumbled Glass - Mini Mowed Lawn - Mini Spectrum Aqua Pens - EssentialsStazon Jet BlackTea Dye - MiniCosmic Shimmer Dries Clear Glue 125mlMini Ink Blending Tools2 Ink Blending Mats ZIG Squeeze & RollCrystal Glitter


Wednesday 28 September 2016

Peter the Polar Bear......


Good morning my lovelies,

I am afraid it is a quick blog post from me for today as I have some not so good news!

I was away demonstrating at Exeter show last week with Imagination Crafts and we were having a fantastic show meeting so many lovely people. 

However when I was driving to the showground on Sunday for the last day, I had a major car accident and ended up in hospital on Sunday. I feel I need to let you know as word has got around from the show and I am getting messages and emails and don't want you all to wonder what is going on!

Luckily although my car is a write-off, I had a few x-rays but I am fine just very battered and bruised.

Thank you so much to Sue and Harvey for all their support the last few days, you have been total stars. Also to my lovely friend Kirsten for caring so much and holding the fort together. 

I am glad to be back home with my lovely hubby now and am just taking things easy. I have already got back in to the saddle and have driven as I felt I needed to a.s.a.p.....

Thank you also to everyone who came to the stand on Sunday sending well wishes and also for your messages, I really appreciate it all.

Julia and Charlie who own the gorgeous B&B that we stayed at were complete saints and picked me up from the hospital and took me to their home to recover.

I feel I really am blessed with knowing such wonderful people.........
.......so once again I thank you all.....

So today I thought that I would show you a couple of samples that I made for the class last month with Peter the Polar Bear.....


I made them using Tumbled Glass Distress Ink for the backgrounds and colouring with Spectrum Aquas that are in the MEGA SALE section on my website......


A little closer look....


I made this one on a That's Crafty white board post card.....


Another closer look.....


I added some sparkle with my finger using Diamond Sparkle Medium.....

Well as I said it is short and sweet from me today, 
I am off to take it easy now.......

Big hugs
Lisa B xxx


Tuesday 27 September 2016

Wrapped Up Warm Mouse


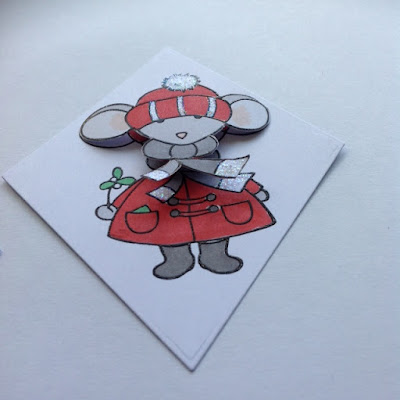
Hello crafters, Julie here, I hope I find you well today... Dare I ask if you have started your Christmas cards yet??? (I wouldn't have got there yet normally). I have another card from the cute Hobby Art stamp set Have a Very Mice Christmas to show you today. I have loved using this set, all the images are very cute.


I cut a square of red card and dry embossed it using a lattice embossing folder. Then I used some silver metallic paint and applied it with my finger to the embossed background to jazz it up a bit.


Next I die cut a piece of super smooth using a diamonds die and stamped my image. I also part stamped the image again (from the coat upwards) on a scrap of card and heat embossed with 
WOW! Clear Gloss embossing powder. 


I coloured the two in using Spectrum Aqua pens (in the Mega Sale on the website). I stamped a little mouse and coloured him in on a small diamond cut piece of super smooth. I cut out the part mouse (head, hat and scarf only), so I could decoupage this on top of the other one with a sticky pad.


I then cut some scalloped diamonds in silver Mirri card slightly larger then the stamped image cards to mat and layer onto. I also stamped a greeting from the same set in red ink and clear heat embossed. I cut lengths of green ribbon and attached them vertically to the red card and tied 2 bows in the same ribbon.


I mounted the embossed card onto a 7x7 white card blank and attached the diamond toppers to the card with double sided sticky pads, stuck the bows I'd tied with Cosmic Shimmer glue and finished off with 4 emerald gems from my stash.


Have A Very Mice Christmas   Spectrum Aqua Pens  Cosmic Shimmer Dries Clear Acrylic Glue - 30ml VersaFine Ink pad - Onyx Black    Clear Gloss Regular WEP  7x7 White Card Blanks & Envelopes

Well, that's me for today, have a good day and see you next week.

Love, Julie x