Saturday 30 September 2017

October Newsletter


  Hi everyone, long time no see!! Welcome to the October newsletter. Apologies for not blogging for a while. I had great intentions, but every week Wednesday seemed to come and go before I'd even realised!


 I hope you've had an enjoyable September. I spent a few days with Sue and Harvey of Imagination Crafts two weeks ago. Sue and I demoed at the Exter Hobbycrafts show and as always, we had a great time. We met lots of lovely crafters and had a lot of fun.  The next time I'll see Sue and Harvey will be at the Hobbycrafts Christmas show at the NEC in Birmingham, I'm already looking forward to it.

The most important thing to tell you right at the start is that there are NO classes in Fant Hall, Maidstone, next Friday October 6. The hall is not available, unfortunately, so I have decided to take myself off to Spain for a little holiday. I leave tomorrow morning and I can't wait! As a result, if you order from the website between now and October 11, it won't be dispatched until October 12. However, if you're attending my Grove Green workshop on October 15 select 'Store Pick-up' when you check out and I'll bring your order to the workshop.

Speaking of the workshop; there are still places available if you'd like to learn how to get the best out of Imagination Crafts' fantastic Rusty Patina. 

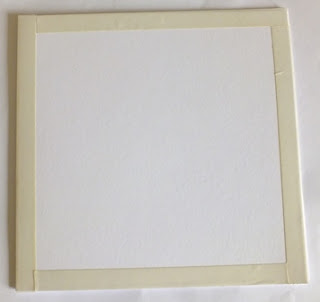
There will be two projects; a working clock and an 8x8 canvas panel.................


We'll be using various colours of Rusty Patina as well as Alchemy Waxes and Starlight Metallic Paints.

Included in the £30 workshop fee will be the projects, a bag of embellishments to use on your projects - any you don't use will be yours to take home - and a FREE 6x6 stencil.
The venue is Grove Green Community Hall, Penhurst Close, ME14 5BT.

You can book online, or email me; lisabaker1@btinternet.com, before Saturday, October 14.
Please bring your lunch, (there is a Tesco beside the hall), an apron, paint and stencil brushes - my go-to stencil brushes are the domed stencil brushes and they are available on the website.

The workshop after the Rusty Patina one will be the Christmas workshop on November 12.


A kit to the value of £20 is included in the £40 workshop fee and more information can be found HERE.

The next classes at Fant Hall, Maidstone ME16 8NN will be on Friday, October 27. The projects will be two cards with a snowman theme..............


We will be using Distress and Versa Color inks, colouring pens and lots of loose glitter!


If you would like to join us on Friday October 27, there a couple of places left in both classes; 2.30 - 5.30pm and 6.30 - 9.30pm. The class fee is £16 and this includes your projects, a tool kit to use during the class and tea/coffee and a slice of cake.
Places must be booked in advance; a deposit of £6, or full payment, will secure your place. Please contact me by lunchtime on Thursday October 26; lisabaker1@btinternet.com/01622 675078

I've added some very cute snowmen stamps to the website and restocked items that sold out at the September class, as always, you'll find all the new products in the

I have scheduled a few blog posts for the next few weeks, so you'll see me here soon......

I hope you have a great weekend. Until next time, happy crafting.

Lisa B xx


Thursday 28 September 2017

A Sparkly Wreath for Christmas


Good morning all! Martina here with a sparkly take on the Christmas Wreath Stamp by Nellie Snellen. How many Christmas cards have you made already? My daughter has already made her 'special ones', written them and put them in envelopes (this was actually all done by August!). If only I was a bit more prepared...

This week I have gone all sparkly with embossing powders for my card. I hadn't really 'twigged' that using this stamp and its layers would be perfect for creating an embossed design!! Coupled with the use of a stamp press and you are 'cooking on gas'...

Now my excuse for the lack of photos here is simply that, well, I kind of forgot. It is such a simple card to do, it really doesn't need them anyway, you'll see what I mean...

Using some black card, I cut a topper and put in my stamp press. I placed the first wreath layer (greenery) into position and then stamped onto the card with Versamark. Removing the card, I applied some green Embossing Powder. The next layer was the cones/twigs layer, so I repeated the same process again with brown powder. The final layer is the red berries, bow and flowers. Now at this point I had a slight 'poo' moment, (!) as when I added the powder and heat embossed, you could hardly see the detail. The reason for this was that I had used some very old (12 years) red embossing powder that I bought very cheaply... The solution here was to simply put the card back in the press and repeat the stamping over the top and add more powder. This effectively meant that I was 'double embossing'. Still not happy, I then 'triple embossed' and then, well, what ever the next one would be...(quadruple embossed? Is that a thing?) Eventually I got there folks! (I then chucked my powder away...)
 The sentiment from the Hobby Art Christmas Frosting Set was added in the same way, this time with Wow White Powder


All layered onto a card blank, some white dashes and all done. I think it would have taken half the time if I had had some decent powder...lesson learnt!


The next Grove Green workshop is on Sunday, October 15 and it's all about Imagination Crafts' fabulous Rusty Patina. Click for info and booking details.

See you soon,
Martina
xxx
Opaque Bright White WEP Versamark Ink Pad Christmas Wreath 1 Christmas Frosting HA


Thursday 21 September 2017

A Layered Wreath Card with a Sprinkle of Beads


Good morning ladies and gents! Martina here with a more intricate take on the lovely Christmas Wreath nesting stamp set I have been looking at this month. I have shown some 'quick' makes over the last couple of weeks, so I thought I would show you my favourite card for this month, which is a bit more time consuming, but worth it.

I wanted a soft look to my card this time, so instead of using white card and bright colours, I went with a cream card topper base and some muted colour tones from the Versacolor Ink range. Just as before, I used my stamp press to add the three layers and colours to the wreath, but I did not ink the large bow at the top.


I then repositioned the mid-layer (cones/stick layer) stamp on my press, so that it was upside down. Inking only the cones, I stamped them onto the wreath once again.


Putting the red layer back into the press, I stamped lots of the poinsettia flowers all over some more cream cardstock. I needed 2 stamped flowers to create one for the wreath, as I wanted to layer them up for extra dimension. For the top layer in the flower, I simply cut away the lower leaves.


I added a sentiment from the Hobby Art Christmas Frosting Set to the middle of my wreath, stamped in the same brown as the cones. I then started to position where I wanted my flowers to sit around the wreath.


With the positioning sorted, I moulded the flowers with an embossing tool to give them some 'movement' and glued them down. As I had not stamped with the brown layer when stamping all the flowers to be cut out, there was no detail to the middles of them. I started by adding some brown dots with a pen, but they looked really flat, so I decided to do one of my favourite things - add beads! I found some tiny amber coloured seed beads from my stash, added some Silicone Glue to the middle of each flower and placed some beads on top. I left these overnight to dry, so that I was not tempted to prod them...


All done! I am pleased with this one, anyone who knows me knows that I hate cutting out, but the flowers weren't that fiddly, so this was not too bad! It is one of those things you could do in front of the telly I suppose...


The next Grove Green workshop is on Sunday, October 15 and it's all about Imagination Crafts' fabulous Rusty Patina. Click for info and booking details.

See you next week for my last wreath card!
Love
Martina
xxx

Christmas Wreath 1 Christmas Frosting HAVersacolor Brown Clear Silicone Adhesive


Thursday 14 September 2017

A Wreath Collage Card


Hello folks, Martina here with another take on using the Nellie Snellen Wreath Stamp. Hasn't Autumn crept up fast? I know it has not 'technically' started yet, but it definitely feels like it here. It will soon be time for my annual mushroom hunting trip in a forest I love, (not to pick, just to spot) as well as time to start thinking about Christmas, I suppose!

This week I have a card to share that can either be considered as one, rather large, 8x8 card, or 4 little ones. Once again, I wanted to be able to create a fairly simple card, that I could replicate easily, but that was also 'handmade'.
Using my stamp press, I placed the first of my stamp layers into position on the top plate. You may be wondering why it is stamped up and to the left, the reason for this being that the first time I stamped it, I didn't realise that some parts are obviously bigger than others and so got caught on the edges of the press...doh! To get around this, and still make life easy for myself, I cut 4 pieces of card to equal sizes. I stamped the 'green layer' of the stamp onto each piece. I then switched the stamp layer and changed colour to repeat the process. As the card pieces were all cut to the same size and placed tight against the stamp press corner, the position would be perfect for each one (obviously if you wanted to make more than 4 cards, you would do the same for how ever many you wanted!)


Once I had stamped all my layers with Versacolor Ink on each topper, they looked like this...


Yes, but it is all 'off to one side' I hear you say - no problem. As each topper was the same size and stamped in the same place, I measured how big I wanted it to be and repeated the measurements and cuts for each one. If you were making 4 different little cards and not one large one, this would not matter so much, as the wreaths would not be next to each other in one place (up to you, really!)

The next step was to choose the decoration I wanted to add to the insides. I used some Christmas Card-io stamps and a sentiment from the Christmas Frosting Hobby Art Set, playing around to create little 'scenes'. I used torn paper to create 'hills' and cut out circles to mask off 'suns' ( if you would like to see more of how this is achieved, check out last week's blog post HERE) Versacolor, Distress and Archival Inks were used to stamp with (depending on the colours I had!). The final touches were to add some stickles and glittery bits!


Voila! I think I prefer these as 4 individual cards, as the 8x8 one is a big piece to take in, but it's all about the 'journey' as they say, and not the destination!

The next Grove Green workshop is on Sunday, October 15 and it's all about Imagination Crafts' fabulous Rusty Patina. Click for info and booking details.

See you next week,
lots of love,
Martina
xxx

Christmas Wreath 1 Versacolor Brown Christmas Frosting HA
  

Friday 8 September 2017

Reindeer Dies & Sparkle

Hi there crafters, it's Friday again and my little offering for the blog.
 
A nice simple little card today but using some super little Marianne dies we worked with at the September class last Friday.
 
 
Using a 6" x 6" white card, I taped around all four sides of the card using double sided tape.
 
 
Then I burnished some fine glitter from the Encrusted Jewel Kit onto the tape.
 
 
Next came some matting and layering, I used some sparkly red card from my stash, then created a white sparkly matt by using Woodware Double Sided Sheets and the glitter again.
 
 
Next I die cut the dies as follows using the red sparkly card again:
And a sentiment from my stash
 
 
Once I'd cut the dies I ran them through again using the embossing mat to create the detail.
 
Next was to put the card together by matting the white sparkly card onto the red then onto the main card.
 
Using Cosmic Shimmer Dries Clear Glue I placed the little ivy die cut into the corner and then the sentiment before deciding where the reindeer where going to go.


I decided I wanted to flat mat the female reindeer and double 3D the male reindeer with  Mini Mount Pads. You can see the shadow it created in the next photo
 
 
Voila all done, as I say nice quick little card to batch make for Christmas I think.
 
I'm looking forward to the Paper Artsy class on Saturday I hope some of you are there too.
Take care and see you again very soon
Love Jan -x- 


Thursday 7 September 2017

A 'Sepia' Style Wreath Card for Christmas


Good morning all! Martina here with the first of a series of Christmas cards... Yes, there is no point in denying it, it is on its way now! On the upside - it feels all 'autumny' here, cold and bright mornings for the school run and bright colours starting to peek though. Anyway, enough of my musing and back to the job in hand...

So, the cards from me this month are all very easy and quick to do (perfect for batch making). With the addition of a stamp press, (such as the Press to Impress) you can be 'cooking on gas' in no time! 

The main element of my card is a layered Wreath Stamp from Nellie Snellen. There are 3 separate layers to the set, so it easy to stamp each colour layer without having to colour in or do any fiddly inking. It is also easy to line the layers up as the stamps are all clear and a good size.
I started my stamping by using the cones and sticks layer with some Bark Versacolor Ink. While the stamp was still in the press, I inked the same layer again with a darker brown to give some shading and depth. With the brown layer done, I moved onto the greenery and used Bamboo Ink with another darker green on top (I am rubbish at writing the colours down I use, it tends to be the nearest one...)
The last layer is the floral and bow detail. I decided I wanted to have a muted, sepia tone for this card, (more manly?) so I went for the creamy poinsettias that you sometimes see. I inked the flower and berries with Vanilla Versacolor and stamped down. It was very feint, so I inked again and repeated. To add a little more colour, I dotted some Canary Versacolor to the edges. To add the bow and finish the wreath, I inked it in Burgundy.


With my wreath all done, I decided I wanted to use it as a frame for a little scene. I cut a little moon from some sticky notes and placed into what would become the sky. Using some Scattered Straw Distress Ink (or maybe Antique Linen??), I smudged the ink outwards to leave a 'halo'. To create the ground I used some good old torn paper and a brown...(Vintage Photo?? who knows...!)


Using the same colours, I inked around the edges of the topper to bring the eye in. I added a couple of deer from a Christmas Card-io set and a sentiment from the Hobby Art Christmas Frosting Set to finish off (I stamped with Potting Soil Archival Ink to keep with the brown tones). Ta dah!


That's it from me this week, I am off to Lisa's PaperArtsy workshop on Saturday, so might see some of you there? There are a couple of places left...

Love
Martina
xxx

Christmas Wreath 1 Press to Impress Stamping ToolAntique Linen - MiniVersacolor Brown Christmas Frosting HA