Showing posts with label Cosmic Shimmer Glue. Show all posts

Friday, 8 September 2017

Reindeer Dies & Sparkle

Hi there crafters, it's Friday again and my little offering for the blog.
 
A nice simple little card today but using some super little Marianne dies we worked with at the September class last Friday.
 
 
Using a 6" x 6" white card, I taped around all four sides of the card using double sided tape.
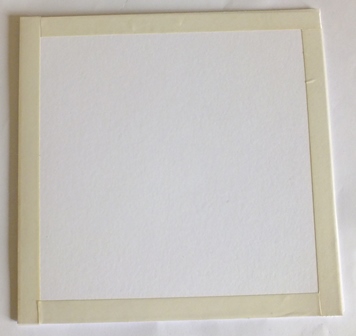
 
 
Then I burnished some fine glitter from the Encrusted Jewel Kit onto the tape.
 
 
Next came some matting and layering, I used some sparkly red card from my stash, then created a white sparkly matt by using Woodware Double Sided Sheets and the glitter again.
 
 
Next I die cut the dies as follows using the red sparkly card again:
And a sentiment from my stash
 
 
Once I'd cut the dies I ran them through again using the embossing mat to create the detail.
 
Next was to put the card together by matting the white sparkly card onto the red then onto the main card.
 
Using Cosmic Shimmer Dries Clear Glue I placed the little ivy die cut into the corner and then the sentiment before deciding where the reindeer where going to go.


I decided I wanted to flat mat the female reindeer and double 3D the male reindeer with  Mini Mount Pads. You can see the shadow it created in the next photo
 
 
Voila all done, as I say nice quick little card to batch make for Christmas I think.
 
I'm looking forward to the Paper Artsy class on Saturday I hope some of you are there too.
Take care and see you again very soon
Love Jan -x- 


Friday, 14 July 2017

Rice Paper Easel Card

Hi there all, hope you're all doing ok.

Today's little card is another easel, I'm enjoying making these at the moment.  But this time going a bit shabby chic with the Imagination Crafts Rice Papers and my take on last Friday's workshop.

 
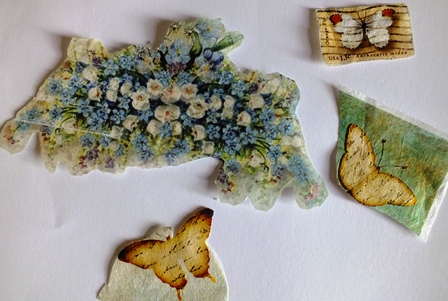
So using the materials from the class pack I cut out the large butterfly roughly then glued onto some white card using the Imagination Crafts Magi Bond, I love this stuff, then cut it out and left to one side.


Next I chose a few elements from the rest of the Rice Paper .


I then took the ready cut background card and glued them randomly into place using the Imagination Craft Magi Bond.  I left that all to one side to dry off.


Next I prepared the easel in the normal way by taking a 7" x 7" card and folding the front in half then cutting a piece of white card the same size as the card to add the image to and would be the upright of the easel card.

The base of the card I cut a another piece of silver mirri card the same size as the supplied piece and covered it with some Imagination Crafts Rice Paper leaving a border of silver showing.


I went back to the main feature of the card and embossed using the Crafter Companion 3D Regal Swirls Embossing Folder.


Very nice, these 3D folders are brilliant.

To make the embossing stand out more I used Antique Linen Distress Ink, the same way as in the class, and lightly blended the colour avoiding the Rice paper elements.  So rather than use the foils I thought I'd give it it's drama by just using Sparkle Mediums.  I went over the whole image with Imagination Crafts Sparkle Medium Silver Dollar then Blue Moonstone using my finger to apply the medium which gave it the occasional foiled look anyway .  I did the same on the wings of the butterfly.


I decorated the butterfly with the little embroidered sample and added the flower we had in our packs.

 
I matted all the layers together by first placing the main image onto the blue basic Bazzil card stock then onto the silver mirri before sticking all onto the upright of the card.  Then using double sided tape and a little cosmic shimmer I set the upright into place.
 
The last things to do where to add the easel block that makes it stand up, so cut a piece of the same basic Bazzil card and 3D it placing it about a third of the way up the base of the card, then added a little sentiment.
 
I then wanted to use the Imagination Crafts Clematis Elements stamp set to create 3 flowers, so I glued some Rice Paper onto some white card, leaving to dry before stamping 3 large and 3 small flower heads with Versafine.
 
 
I cut them all out and glued the smaller flower head inside the large, shaped them with a ball tool and place a blue gem in the centre of each.  I don't like throwing away any waste so I cut out two little butterflies and placed them on the base of the card to finish it all off completely.


Well that's it for today, I hope you enjoyed the blog today, I must admit the Rice Papers are one of my favourites to use and there are so many to chose from, you could use any to create a card like this weeks.

Back again next week
Love Jan -x-


Friday, 9 June 2017

Indigo Blu Ella Bella

Hello all, I hope you're all well, who can believe we are into June, where does it go.
 
Today's card is using Indigo Blu and Imagination Crafts Products.


I started with a 7" x 7" white card and cut a black then white mat, which I used for the images.
 
I stamped the Indigo Blu Ella Bella stamp (which is 22% off on the web site at them moment), and using Versafine Black Onyx with WOW Clear Embossing Powder. 
(Sorry I forgot to take a photo of Ella Bella on her own, I was eager to get onto the next step)
 
Next I used Imaginations Crafts Clematis Elements, (29% off of the web site)  but only wanted to use the Clematis Elements.  I stamped 3 large and 3 small flower heads again using embossing powder, then cut them all out and put to one side
 
 
The next step was to put something in the top right hand corner ad was inspired by the free stencil you got free at the Friday Class.  I only wanted to use the corner image, so placed it on the card and tapped off using Repositionable Tape, everything I didn't need before spreading Imagination Crafts Structure Paste over the stencil.


Whilst that was drying, I shaped the flowers and placed the smaller flower head inside the large and glued with Cosmic Shimmer Dries Clear Glue a Clear Diamond Gem in each centre.
 
Once the paste was dry I placed the stencil back over the card and taped it down as before making sure I only had the paste elements showing through.  I decided to use Imagination Crafts Black Starlights to give it a bit of sparkle.


 I wanted a sentiment so used the one from the Clematis Elements, this actually comes as one stamp but I cut mine in half length ways to create two stamps so I could place them where I wanted.  Stamped using the same mediums as before.
 
I decided it needed some more dimension so stamped 5 little butterflies from the New Imagination Crafts Time to Celebrate stamp set, designed by Lisa, stamped and embossed as before and cut out.
 
 
To finish the card I matted the black onto the card then the finished card onto that before gluing on the butterflies and flower heads.
 
Here's the card again, I hope you enjoyed the demo, not too difficult, all techniques we've used before.


Thank you for dropping by the blog again today.
Love Jan -x-


Friday, 28 April 2017

Craft Emotions Wooden Embellishments

Hello all, today's little card is made from the Craft Emotions Wooden Embellishments range.


It a very quick little card but quite sweet I think.
 
First of all I chose the little owls I wanted to use from the Craft Emotions Owls & Branches Set and painted them using Imagination Crafts Starlights, Topaz and Pearl.
 
I took a tiny amount of the Topaz and placed it on a tile and added double the amount of Pearl to really lighted it up.  Mixed it to the shade I wanted by adding tiny amount of Pearl until I was satisfied with the colour.
 
Using a fine detailed brush from the Artist Brushes set I painted around the owl including the wings with the Topaz & Pearl combination.  I then used Starlights Clotted Cream for the owls chest.  Next was the little feet which I used Starlights Black. 
 
The branch was painted using Topaz and leaves Menthol.  I then stuck on some wobbly eyes with Cosmic Shimmer to give them a character.
 
 
For the card I matted some Green Bazzil Basics card onto a 4" x 6" card.   I then took some craft card cut slightly smaller than the green and run that through an embossing folder that I thought looked a bit like a tree.  I then cut a circle out for one of the owls to sit in.  Next I took a piece of craft card enough to sit behind the circle cut out area.


I mounted the embossed card onto the main card and glued the owls in place with Cosmic Shimmer.


And that's it simple but with character, I hope you liked it and thank you for dropping by the blog again today.
 
Love Jan -x-