Thursday 31 October 2013

Snow Fun

 
Hi! It's Georgina with my regular Thursday post.
Today I have two card toppers to share with you. I used Hobby House Snow Fun topper sheet which is available from Lisa B. Designs.
 
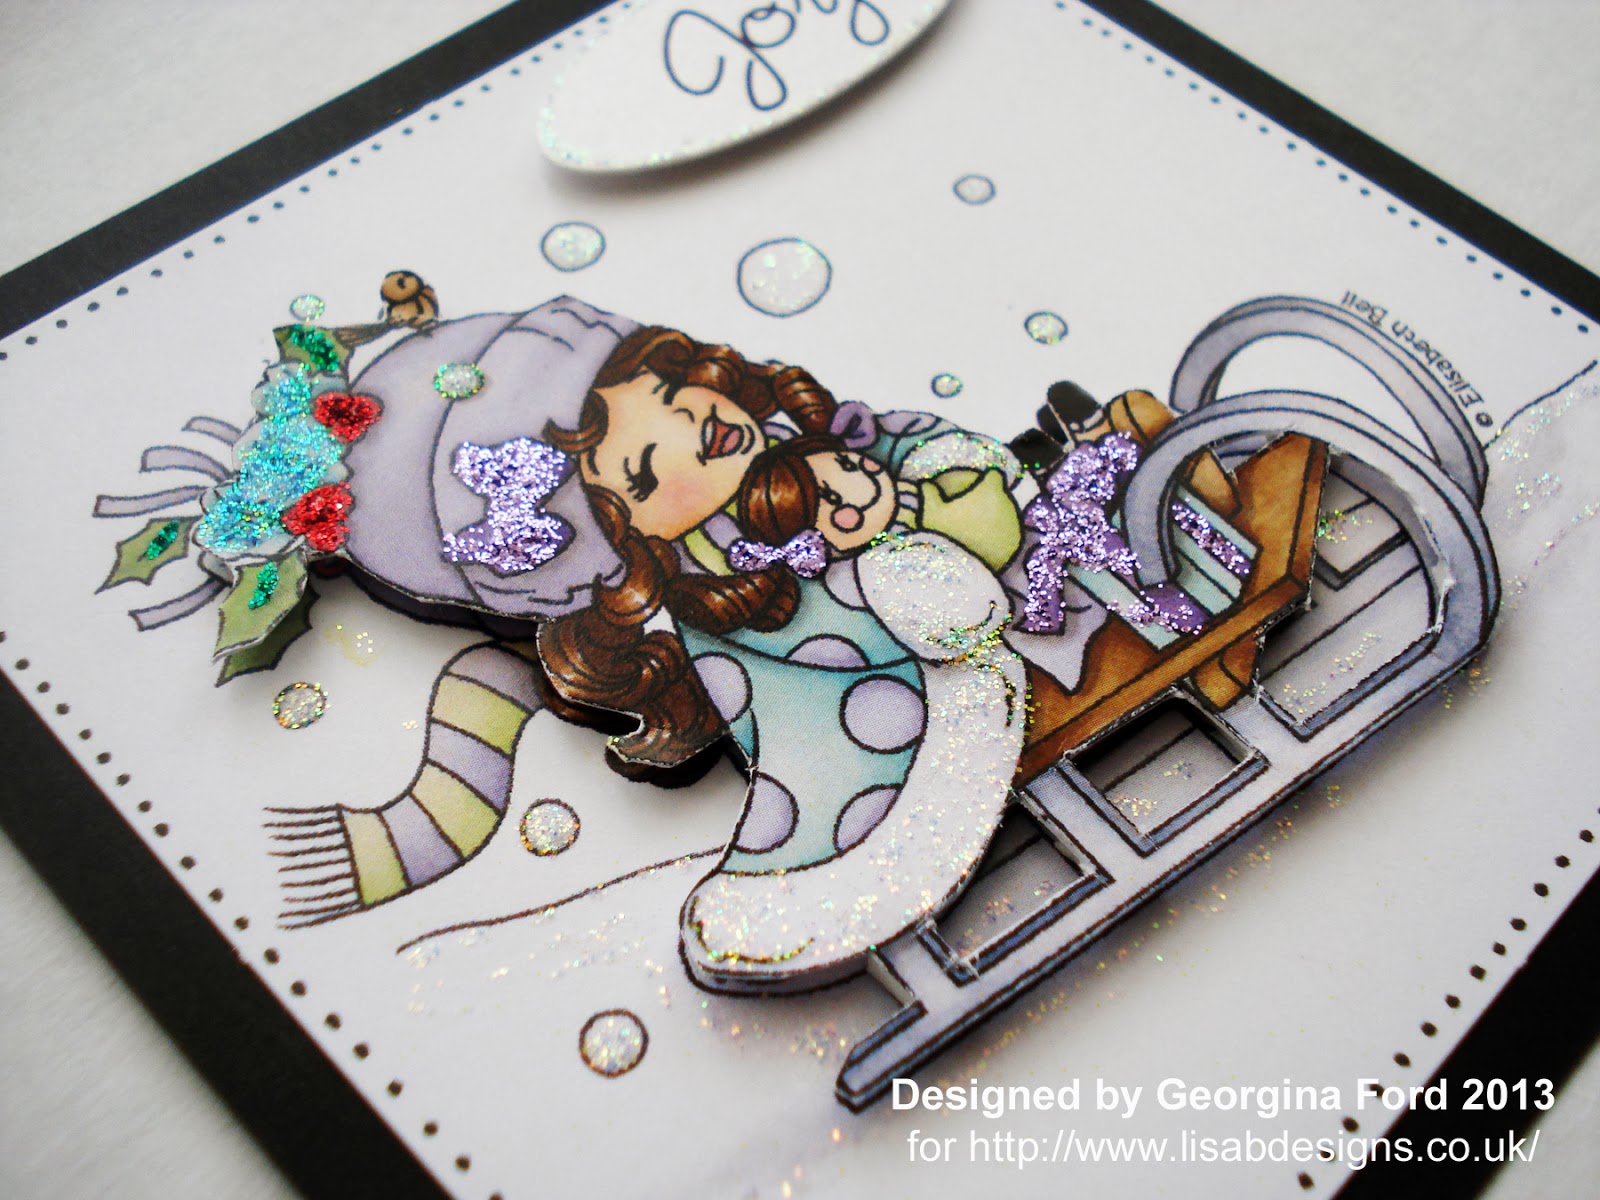
On one topper sheet some of the image are repeated, so this gives you an ideal opportunity to create your own decoupage. I chose two cute images, the post box and sledge. As you can see below I kept one image as it was and the second I cut out sections.

 
I attached the main images to a pieces of black card. I then attached the cut-out pieces with foam pads.

 
To add extra festive sparkle I added various Stickles. To finish the toppers I added a die cut sentiment and black dots with a fineliner.


The Hobby House Elisabeth Bell - Snow Fun  Glitter Glue - StardustGlitter Glue - Xmas Red

Glitter Glue - HollyWoodware Mini Mounting Pads - White- 2mm


Tuesday 29 October 2013

Vintage Norman


Hello crafters, Kirsten here.
 
 I’ve given Norman a vintage look today. I stamped him with Coffee Archival, heat set with WOW Clear Sparkle embossing powder & coloured with an assortment of cream & brown Whispers watercolour pens.

012

Next I decided on the card layout. I used a 20x20cm card blank & core’dinations papers layered on top. Then I stamped the Hobby Art Butterfly Kisses snowflakes with Versamark ink on a 15x15cm piece of white card, heat setting with WOW Bright White embossing powder.
 
I cut the square into three 5x15cm strips, brushed Frayed Burlap distress ink over the snowflakes & Walnut Stain DI around the edges. I used a baby wipe to remove the distress ink from the embossed snowflakes.
 

008

I used the largest of a Spellbinders label die to cut the snowman image & used the same die as a template to hand cut a larger label from a piece of core’dinations.  I found the ribbon in my stash & added gold liquid pearls & http://www.lisabdesigns.co.uk/glitter-glue-gold-p-1597.htmlhere & there. The greeting is from my stash.


013

 
Norman and Friends  WA01 Clear Gloss 160ml  Glitter Glue - GoldLiquid Pearls - Gold Pearl  Butterfly Kisses Snowflake Clear Stamp Set  WL01 Bright White 160ml
 
 
Thanks for looking. Just a final reminder about the October challenge, it ends on the 31st. I will be back on Friday, November 1st with a new challenge & October’s winner.
 
Until then happy crafting.
 
Kirsten.

Monday 28 October 2013

The Big Reveal on my Craft Studio.......!!!

Morning all,
 
Well the time has finally come for me to show you some pictures of my new studio.
I know it has been a long time coming but it has been worth it in my eyes as it gives me a clean inspiration space to work in and it has been great coming up with a theme and designing everything to go in there.
The decking has still got to be finished off and some other bits in the garden but here goes.....
 I hope that you like it as much as me.....


My shabby chic dresser greets you as you walk in but it gives brilliant storage space and I can see where everything is!!..........


A few welcoming signs or not as you enter!!!!!
 
 
Punches all organised, I didn't realise that I had so many?........and these are the ones that I have decided to keep!


And my dies too, just Sizzix that is.........


I have to have my sounds around me and the telly of course.........


Making the most of the space......


A great comfy chair and a small work space, no more piling up a 6ft table with lots of off cuts or not putting things away anymore..... there's no where to leave it and still work!


Look at all that MDF waiting for me to get my hands on it and that's just some of it!........

 
I spoke to a lot of my ladies at my last class and explained that from next year, I will be running two to one all day workshops, 10am until 4pm that will include a cooked lunch as well. You will get to spend the day with me in the new studio where you will create various projects and go home with a goody bag too....
I have had a lot of great response to this and have quite a few names down already for next year.
If this is something that you would be interested in doing and want to know more details, then you can email me at: lisabaker1@btinternet.com or cal me on: 01622 675078.
I will be contacting people in December with the contents info and to book dates for 2014.
I will as from next year be running a Class workshop from Fant Hall on the first Friday of every month except January which is too early for everyone.
 
I hope you have enjoyed sharing my studio with you, let me know what you think and leave me a comment.
 
Big Hugs Lisa.B.xxx

Friday 25 October 2013

Jolly Holly

Hi everyone

Here is the card I made this week using the 
Woodware  Clear Magic Jolly Holly stamp set
available HERE


The background paper is from the 


I used black onyx Versafine to stamp the jolly holly design and wording
I then stamped the leaves and bauble on to some green and red coredinations cardstock
I cut out the leaves and paper pieced them to the design with Cosmic Shimmer dries clear glue
I used Woodware mounting pads to 3d the bauble
I finished off by matting and layering with the green coredinations cardstock and using

Thanks for looking and see you the same time next week

~Suzanne~

JOLLY HOLLY Clear Stamp Christmas Post Collection  VersaFine Ink pad - Onyx Black Woodware Large Mounting Pads - 2mm

Glitter Glue - Xmas Red  Glitter Glue - Holly Glitter Glue - Platinum Cosmic Shimmer Dries Clear Acrylic Glue - 30ml

Thursday 24 October 2013

Snowflakes

 
Hi! It's Thursday again so it's Georgina here with my regular weekly post. Today I have a Christmas card to share with you. I used Joy! Craft Edge cutting die to create a snowflake which I have used as a mask and also an embellishment.
 
To create the snowflake I die cut three Edge shape designs. I attached the three shapes together to form a snowflake as shown below.


I used the snowflake as a mask. I used Cut-n-Dry foam to add the coloured ink. The ink pad I used was Peeled Paint Distress Ink pad. 

 
Once I took away the snowflakes this is what was left on the card blank. A lovely detailed snowflake design.

 
I continued the same progress all over the card blank.

 
I turn the snowflake over and attached it to the card blank with foam pad. To finish I added a die cut sentiment and Stadust Stickles to the sedge of the snowflake.

 
Cutting & Embossing - Edge   Peeled Paint Distress Ink Pad  Glitter Glue - Stardust

Tuesday 22 October 2013

Norman in Pieces

Hello blog visitors, Kirsten here. It’s Tuesday, so it must be my turn on the blog.

 I didn’t have any idea what I wanted to do for my post this week, so I started by stamping Hobby Art's Norman stamp with black Archival & heat setting with WOW Clear Sparkle embossing powder, then colouring with Whispers watercolour pens. As I coloured I began to get an idea, so I stamped the image on a C6 card blank, again with black Archival & embossed with the Clear Sparkle EP.
 
005


Next I cut out some of the main elements from the first image. I cut them as close to the borders as I could, then ran around the white edges with a black pen.
 
 
006
 

As I was doing this I wondered if I could make a paper bauble to use as an embellishment, so I die cut six scalloped circles from a scrap of red core’dinations paper & folded five of them in half.
 
 
001
 

Using Cosmic Shimmer glue I began sticking the semi circles to one side of the unfolded circle, layering them on top of each other.
 
 
003
 

I used four semi circles & glued the other side of the fourth one to the left side of the base circle.
 
 
004
 

Voila! A Christmas bauble with added glitter on the finished card.
 
 
010
 
Norman and Friends  Mini Glossy Accents    Glitter Glue - Gold  Glitter Glue - Xmas Red   Woodware Mini Mounting Pads - White- 2mm    WS15 Clear Sparkle 160ml


Thanks for looking & thanks also to everyone who has taken part in the blog challenge so far, there’s still plenty of time to enter, so if you’ve been thinking about it, why not have a go?
Until next time, happy crafting.
 
Kirsten