Wednesday 29 November 2017

December Newsletter

Hi everyone, Lisa here and we're just a few days away from December! I hope you had a great November, mine flew by, I can't believe it's time for the Christmas party classes already.

The classes are slightly different this year, in that they're happening in two different venues.

The evening class takes place in Fant Hall, Maidstone ME16 8NN, as usual, between 6.30 and 9.30pm. This class is now fully booked.

The afternoon class takes place in Grove Green Community Hall, Maidstone ME14 5BT, between ***1.30 and 4.30pm***.

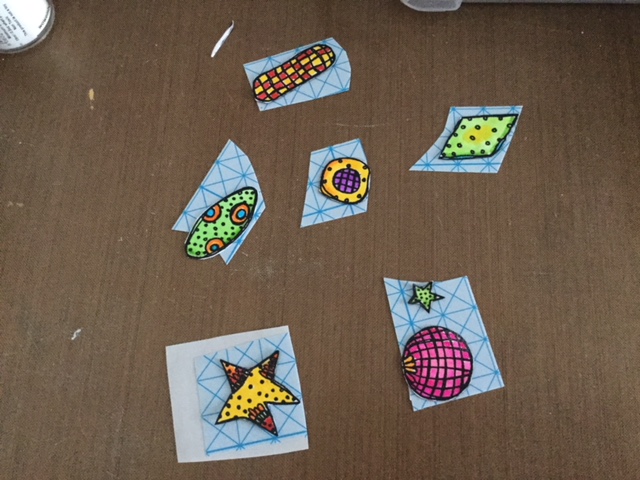
Here is a sneak peek of one of the class projects..............


There are a couple of places left in the afternoon class on Saturday, so if you would like to join us please contact me by lunchtime on Thursday, November 30; 01622 675078.

The fee is £18, which includes the projects, tools and items for use during the class, and a full buffet.

If you're attending one of the classes, it would be helpful if you could bring paintbrushes and Distress Inks in the following colours if you have them:

Vintage Photo/Tea Dye
Broken China/Faded Jeans
You are welcome to order goods from the website in advance of the classes, please let me know by lunchtime on Thursday November 30 and I will bring the items with me.
The shop will be open as usual during the classes, please feel free to drop in if you're in the area.
For fans of Craft Stamper magazine, the January 2018 issue is now in stock. The free stamp in this issue is a beautiful snowflake image. 


All of the new products in stock can be found in the What's New section.
I will be announcing dates for 2018 workshops soon, so look out for updates on the Lisa B Designs Facebook page and here on the blog.
Have a great week, see you next time.
Lisa B xx

Monday 27 November 2017

JoFY Snowman

Good morning, Kirsten here, happy chilly Monday. I hope you had a nice weekend. I've got two quick Christmas cards to show you today, both made with the very cute snowman from stamp set JOFY58 from PaperArtsy...................

This one has a background of Victorian Velvet Distress ink, with Picked Raspberry DI sponged lightly through a snowflake stencil and splatters of Silver Starlights Metallic Paint.

I stamped the snowman on to the background with Jet Black Archival and again onto white card with Onyx Black Versafine, heat setting with WOW! Clear Gloss embossing powder. I coloured his hat and the baubles with pens before cutting him out and fixing him to the background with Cosmic Shimmer Dries Clear glue.

I finished the card with a little bit of scribbling with black pen and matting and layering onto a 6x6 card blank..............


Card no. 2 was another very quick background. This time Squeezed Lemonade and Spiced Marmalade Distress inks on white card, with Royal Blood Infusions from PaperArtsy sprinkled on top and spritzed with water. When that was dry I added splatters of Rich Gold Starlights

I made sure the background was thoroughly dry before applying Imagination Craft's Structure Paste through the same snowflake stencil as above, otherwise the inks would have tinted the paste. I added glitter to the wet paste, but it's not showing up in the photo. 

I repeated the steps with the snowman as above, placing him at the bottom of the card this time and adding the sentiment from JOFY56....................


On Friday and Saturday of this week the Lisa B Designs Christmas Party Classes take place - SO much to do beforehand!! :-) There will be a newsletter going out in the next few days, but please note the time of the AFTERNOON class............

Saturday, December 2 at Grove Green Community Hall, Maidstone ME14 5BT
between
***1.30pm and 4.30pm***

The evening class will take place at the usual time of 6.30pm to 9.30pm on Friday, December 1 in Fant Hall, Maidstone ME16 8NN

The shop will be open during both classes if you want to drop in.

***Look out for a sneak peek of one of the class projects on the Lisa B Designs Facebook page later on this morning.............***

JOFY 58 - NEW!!    Victorian Velvet - MiniPicked Raspberry - Mini      Infusions - Royal Blood     JOFY 56 - NEW!!    Structure Paste 

Silver SLRich Gold SLRanger Archival   VersaFine Onyx Black     Clear Gloss Regular WEP 

Cosmic Shimmer Dries Clear Acrylic Glue - 30ml

Gift Vouchers Available 
                                               lisabdesigns@btinternet.com/01622675078

That's it from me for now, have a great week.

Kirsten

Friday 24 November 2017

Paper Pierced Mr Frosty

Hi there crafters, another little Christmassy card for you again today.


So as usual I started with the 7" x 7" white card blank.
Then cut several pieces of card in lilac and white for matting, layering and embellishing as follows:
 
6 ½ x 6 ½  Lilac Bazzil Basics Card
6 ¼ x 6 ¼ Plain White Card
6 ¼ x 2 Lilac Strip
6 ¼ x 1 ¾ White Strip
6 ¼ x 1 ½ Lilac Strip
 
Then cut a piece of lilac card 4 ½ x 4 ½ then a piece of white card 4 x 4 for the image.
 
 
I then stamped the Woodware Mr Frosty stamp onto the 4 x 4 white card with a little sentiment then again on to some scrap, this is going to be for colouring and cutting out.
 
 
I tipped out a tiny amount of the Starlights Lilac Mist onto a tile and added a very small amount of water and carefully painted in the scarf and hat on the second snowman and painted the stars and hat band with Silver Starlights.
 
On the main image I decided to paint the snowman's body with some Blanc Rusty Patina and before it dried I sprinkled some glitter on him to give more texture.  I also coloured in his carrot nose with water colour paints.  Then cut out the hat, scarf and stars from the second image.
 
 
Next was to put the card together, before that I wanted to add some texture to the background, so using the Hobby Art Winter Snowflakes stamps and the Press to Impress platform I randomly stamped some snowflakes using Versamark and Wow Bright White Embossing Powder.


Then I layered up the white onto the lilac, then place the largest strip down in the centre first before matting the white then the next piece of lilac.


I then 3D foamed the back of the main image and placed that in the centre of the card.
 
Just as an embellishment I used one of the larger snowflakes from the Tando Mini Snowflakes and painted it with Rusty Patina again then covered it glitter, keeping the little start in the centre of the snowflake so I could place a little gem there.
 
I then wanted a bit more interest and just added a few random lilac gems to finish.
 
Here's the completed card again
 
 
Thank you for dropping by the blog again today,  hopefully will see you soon.
 
Love Jan -x-


Monday 20 November 2017

Zinski Art Christmas Cards

Hi everyone, Kirsten here with two more of the Christmas card samples I made for the classes at the end of October. I used the gorgeous Zinski Art 18 stamp set from PaperArtsy.........

The background for this card is just Rich Gold and Red Starlights splattered onto white card. I stamped the baubles on top with Jet Black Archival ink, then again to separate white card with Onyx Black Versafine ink, heat setting with WOW! Clear Gloss embossing powder. I coloured them with Distress inks, cut them out and covered them with double-sided adhesive and loose glitter........


I did the same for the little owl, but instead of gliitter I added Glossy Accents just to his eyes................


The cute little penguin is from is from another Zinski Art set, not in stock at the moment. He has three little stars over his head and I used them on the background of this card, after I'd swiped the white card through some Broken China distress ink, spritzed with water..............

I created the spiky mushrooms, again from Zinski Art 18, as I did the baubles on the first card, but didn't add glitter, just some Glosst Accents to the dots.................


When I stamped the penguin on to the background I made sure his feet were stamped on to the hill, so that when the hill was covered in glitter and he was placed on top of the spiky mushrooms it looked as if he was standing in the snow..............


 Zinski Art 18 NEW    Rich Gold SL   Red SLRanger Archival  VersaFine Onyx Black   Double Sided Adhesive Sheets A4    Clear Gloss Regular WEP     


Gift Vouchers Available 
                                                lisabdesigns@btinternet.com/01622675078

Thanks for visting the blog today, see you next time.

Kirsten


Friday 17 November 2017

Tiny Reindeer

Hi again crafters, todays little offering is based on the October Workshop class.  I liked creating the snowy, glittery hillsides.

I used:

I've tried not to make this too difficult I think the pictures make it look that way but honestly it's nice and easy.
So first I started with a piece of white A4 card which I cut in half length ways.  I had some Mylar that Lisa gave us from a previous class which I used to measure out the hills.
The pictures demonstrate more than I can explain here, as you can see I placed the Mylar in the half way point of the card and drew around the shape, turning it over and doing the same to the other side.


Next was to cut the shapes out and line them up with the already pre cut piece of white card I would be using for the background which was 5 1/2" x 5.1/2".


I lined them back up to I could see which wide I would be adding a little blue shading and then placing onto some Double Sided Adhesive Sheet.


I wanted to add in another hill behind the trees so placed the Mylar on the background card and shaded in the sky using Baby Blue Versa Colour


Once that was done I die cut the Sue Wilson Birch Tree Forest 3 times on white card.  I glued the first set to the left of the card then cut down the second and third die cuts to stretch the image.  I then placed the hill over the top of the forest.

I die cut one of the deer's from the Marianne Tiny Dees die in craft card and place it in front using a 3D pad behind his body and glued his legs directly onto the hill.

Here's the finished card again but with a 3D sentiment...........


Thank you for dropping by again today.
Love Jan -x-


Gift Vouchers Available 
lisabdesigns@btinternet.com/01622675078