Happy November! I am back from beautiful Yorkshire, home of waterfalls, moors, Postman Pat and yummy scrummy WENSLEYDALE CHEESE! (amongst other things!) Guess what I had lots of?!? Such a gorgeous place and some lovely people too, I even got called 'pet' and 'flower'! Love it.
This week I am looking at using Imagination Crafts Starlight Paints and Art Stamps with a few cheats...
When I first looked at the beautiful Winter Robin Art Stamp, I loved the image, but also wanted to break some of the elements down. Sometimes it is hard to see how to do this, so this is where our die stash comes in...I like to look at the dies I already have and use the printed acetate in the packaging of the stamp to experiment with picking different parts of the image. Placing the dies on the acetate allows you to play and start to build a composition in your head.
Once I had a vague idea of where I was going, I used Jet Black Staz On ink to stamp the whole image onto some clear Acetate. I find with large images like this, especially on slippy surfaces, it is easier to take the acetate to the image, rather than the traditional way!
Once stamped, I used my dies to cut out 3 square sections (please excuse the state of my cutting plates, I bet you can guess the whoopsies I've made!!) There were a couple of over-lapping bits, but that wasn't an issue, I just stamped the image again, the same way as before.
Next, I wanted to add some shimmer and what better way to do this on acetate than using Starlight Paints! Because the paints are so packed with colour and gilding flakes, you have to be aware that if you colour with neat paint, you are likely to cover some of the lines on your stamped image (especially if you are impatient like me). You can water the paint down, but this will become too transparent on acetate, so I cheated. I turned the image around and painted from the back. That way I could be a bit less perfect with my painting and still get the pure sparkle coming through!
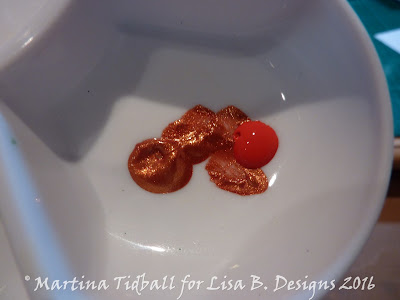
Now came the next (sort of) cheating bit... I wanted to use my Orange Oxidised Starlight Paint, but needed to make it look more 'red'. Simple. I rooted around in my drawers (ooh er...) and found some acrylic paint. I used a tiny amount and mixed it with a small amount of the Orange Oxidised.
Once happy with the mix, I painted my robin. I gave his tummy a couple of coats to make the colour really zingy.
Next, I needed a green. I didn't have the tone I needed, (I can't keep up with all the fab colours!) but no problem, I used the gorgeous Menthol and added a little more acrylic paint as before.
I painted my robin as before, adding a couple of coats and using a little Starlight Silver and Platinum with a little brown paint. You can see how careful I was...!
I repeated the same process on the other die-cut shapes and cut out mats for them. When you turn the acetate over you can't see my messy work.
Now to make a background panel for my card. I used some Platinum Starlight Paint and the Imagination Crafts Christmas Words Stamp to do this. I applied the paint using a Brayer, but you can also use a piece of Cut and Dry Foam to make a paint pad if you prefer.
I stamped the words a few times to cover the panel and added some ribbon in a similar red tone to the robin's tummy.
All put together and voila!
There you go: if you like a stamp and are a little overwhelmed by its size, break it down!
Hope you like it, cheats and all. I will see you next week, once I have had some more of the cheese I bought home...
Love
Martina
xxx
**Remember the Lisa B
Designs November class has been postponed to November 11. Lisa will be demoing
on the Imagination Crafts stand at the Hobbycrafts show at the NEC this
weekend, if you're visiting the show stop by and say hello.**


Beautiful card as usual Martina, I love your idea of cutting the image down xx
ReplyDeleteThank you Jan xx
DeleteStunning card Martina, love your paint mixes - it's great that Starlights will mix with other paints as well as each other.
ReplyDelete