
Good morning all! The autumn colours are now exploding in front of us and it's the perfect time of year to take long walks and enjoy the views of the countryside. With this ready-made inspiration in mind, for my tutorial post this month I am looking in detail at creating a scene with a set of Card-io Stamps called 'Winter Walks'. I was given this set to have a play with and I particularly like it because of the family silhouette. You also get this in 2 perspectives, so you have even more versatility for your creations!

I wanted to make a simple card with the focus being a scene in the middle of the card. I decided to create my own aperture using a standard 6x6 card blank and a basic shaped die (I chose a die that I also had a matching decorative partner for, so that I could create a frame). I cut the aperture from the middle of the card front, retaining the middle shape for use later. I also stamped a simple sentiment from the Card-io Christmas Sentiments set off to the side, using Black Onyx Versafine Ink and heat embossed this with clear detail powder.
I 

Once the aperture was created, I also cut larger decorative shape (lacy circle above) out of Silver Mirri Card. I then placed my original shape (plain circle) in the middle of my silver shape and die cut this. The resultant plain mirri circle was not needed for this project, but I kept it for another make! After repeating this process twice, I was left with 2 lacy mirror frames which will fit perfectly over my aperture: one for the front of the card and the other for a matt layer to be used on the inside.
Next, time to focus on creating the scene for the main feature. I mentioned briefly last week that I find it easier to create a scene in a defined shape, and this card exemplifies this. I always like to practise creating scenes and having a play with perspective, so to start with I die-cut several of the circle shapes I was using out of plan copy paper. This allowed me to have a play and work-out my layout and stamp positioning. Once you have 'got your eye in' it does not take long before you are making dozens of little 'stories' with your scene stamps!

In Lisa's class this month we were given a handy little 'hill' shape to play with made out of Mylar (plastic). This is a great tool to use to create your hills and valleys and you can easily make your own, otherwise you can use copy paper as I have done above. I tore a rough shape horizontally making a valley at one point and placed this 2/3rds of the way up my circle shape (the picture shows me holding the left-hand side of the copy paper back to show you the effect when removing!). Then, taking a yellow ink, (Distress Ink Squeezed Lemonade works well) I have gently worked a 'sunset' oval shape across the valley. Once happy with this, I have intensified the central colour and used Ripe Persimmon Distress Ink to create a setting sun. When you remove your paper, you are left with the effect of a valley.

My next stage was to create some trees showing from behind the hill. Placing my paper hill 'mask' back in place, I have used Black Onyx Versafine Ink to stamp some of the larger trees from the Card-io 'Winter Walks' set. I have used both the first and second generation ink impressions, placing the trees at different heights.

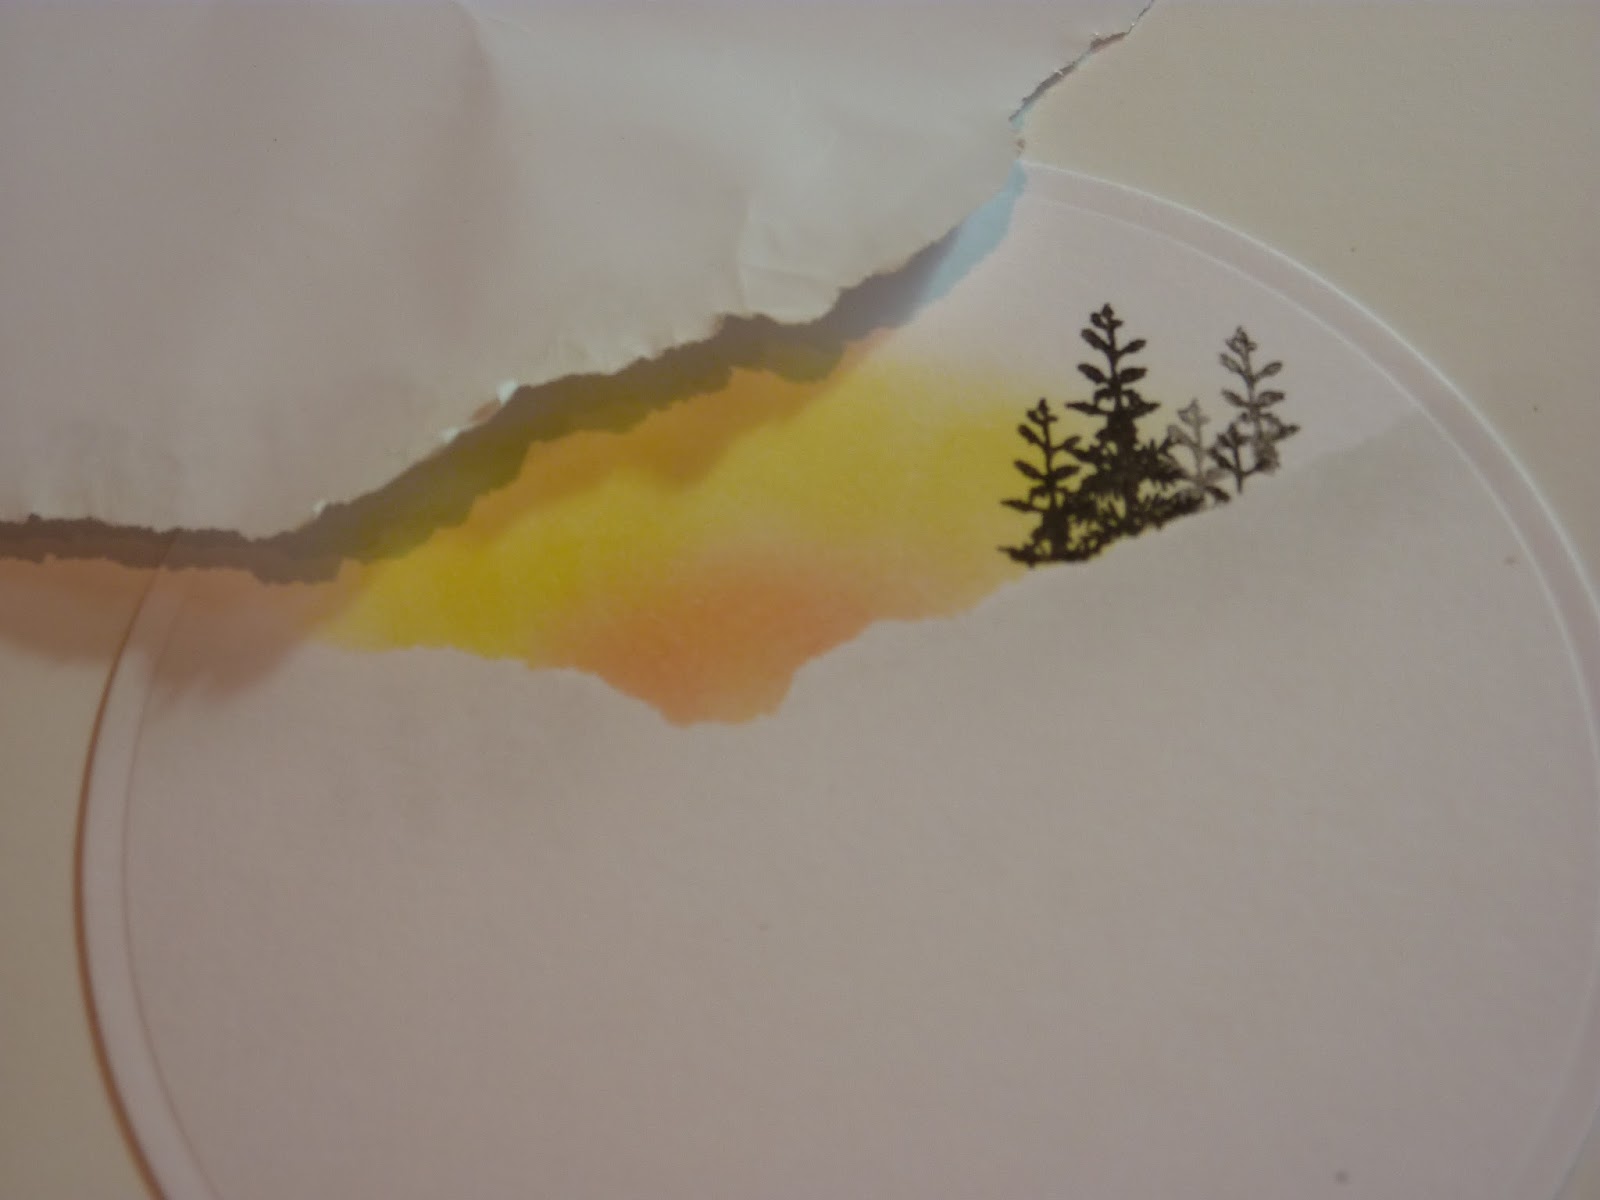
Once my trees and sunset were in placed, I found the piece of copy paper that I used at the start and located the 'top' section that had been torn away (stay with me here...!) I placed this section over my scene so far, shielding this so that I could add a feint hue along the line of the sunset. You can see in the picture above a slight 'grey' effect, which reinforces my valley shape, continues it to the edges and also gives a slight 'misty' effect (or at least I think so, but I admit it is totally personal taste here!).

To finish the scene I have gone back to my Card-io stamps and used some more of the trees. Using my paper mask again, I have stamped the smaller furs further forward (as though appearing behind another hill). I have also used the bare trees stamped at different angles and in both cases created the same grey hue as before underneath the images. Finally, I have added some birds in the sky and the large family right at the front. To draw the image in and give a crisp wintery feel, I have gently added some blue ink around the edge of the whole shape and some Crystal Glitter along my grey 'grounding' lines.

Above is the final card, all assembled. Very simple, but if you have to make lots of Christmas cards that may be the way to go!
If you like making altered art pieces, these stamps also work really well for these...

Here I have used some of the different images from the Card-io 'Winter Walks' set and created the scene on an MDF bauble, primed with White Linen Dylusions Paint. I chose this paint because it gives an even matt coverage without streaks - perfect for stamping onto. I have used the same inks, but heat embossed the whole lot to seal the work. If you don't want to emboss, use Jet Black Staz-on instead!
I hope you like the scenes, it really is a case of having a play with the stamps and seeing what you can create (no-one will know how many 'tries' you have had!).
Happy stamping, see you next week!
Love
Martina
xx


I love both of these, Martina. The card is gorgeous, it would definitely stand out on a shelf full of Christtmas cards & the bauble is beautiful.
ReplyDeleteWhat a super tutorial Martina, thank you, I will certainly be having a go at these.
ReplyDeletex Gill x
Gorgeous makes Martina, lovely blog post too....hugs Lisa B xx
ReplyDeleteLove the stamped scene bauble, brilliant for your own unique tree decorations without fear of breakage either!
ReplyDeleteBrilliant card and bauble Martina, I love your ideas.......all the colour complement each other xx
ReplyDeleteWhat a wonderful tutorial Martina. Thank you so much for some more ideas.
ReplyDeletex Gill x