
Good morning peeps,
How are we all today?
I must say I have not been minding this milder weather lately and my bones don't mind it too!! It does keep changing though from really cold snaps to milder again, let's hope it is not the calm before the storm eh?
Well as promised on my first Card-io Stamps post, I said that I would show you a little tutorial on how I created one of the class cards pictured below:

This card was very popular in the class and can be made with a number of different trees from the same stamp set to get a different look. The stamp set is called Woodland Walks and is great for batch Christmas card making, however it has gone out of stock again but has been re-ordered and I will let you know as soon as it comes back in stock.....
Unfortunately the daylight was not that great in my studio today, so apologies for the quality of some of the photos!
So here goes, get yourself a cuppa and settle in.........
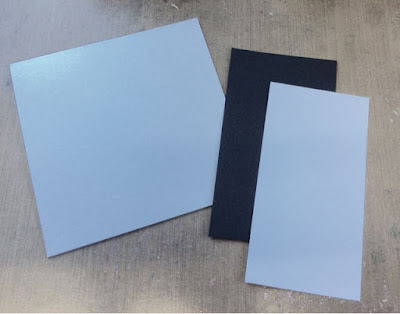
I started with a 6" x 6" white card base and cut a vertical border of super smooth white card with a matting border layer of black card.....
So here goes, get yourself a cuppa and settle in.........
I started with a 6" x 6" white card base and cut a vertical border of super smooth white card with a matting border layer of black card.....

The other tools I used to make the card were a Tumbled Glass Distress ink, a Finger Sponge Dauber, a die cut moon made from Mask-it and a hand cut Mylar mound stencil that I gave all my ladies at the workshop but you could use copy paper, although with the Mylar ( stencil plastic ) one it is easy to wipe clean and use again and again........

I started by peeling off the back of the mask-it moon and sticking it to the top left of my panel of white card.......( sorry dodgy photo ).....

I then placed the stencil on my card and decided where I wanted to create my top
mound......

Next I inked up my finger dauber with Tumbled Glass Ink and worked my finger over the stencil mound, around the top edges of the card and over the moon.....

You can see it quite clearly here, when I pull the mound stencil away......

I removed the moon and added some shading to one side and then I then rotated the stencil to create another mound heading in the opposite direction......

I then carried on and repeated this four times in total to create four mounds....

You can clearly see four mounds below......

Next I wanted to add some trees, so I lined up my stencil mound again and placed it about 1mm below the line. I chose two tree stamps from the set that were the same style but different sizes.
Using the large first I inked up with Stazon and stamped the first tree slightly over the mound and placed over the moon. I repeated with the second tree next to it........

I chose Stazon as you can move on quickly as it is fast drying. If you use a pigment ink like my favourite Versafine Black Onyx be careful not to smudge it as you move the stencil about on your card......

I then worked out more of a placement adding the other large trees in first and then going back over and adding the small trees......

Once the trees were all stamped I decided to add some birds, these are from the Cardio Winter Walks Stamp Set. Then I finished it off by using a Zig Fine Glue Pen and some Stampendous Crystal Glitter......

Once dried I matted it all together and then added a Stampendous Merry Christmas Sentiment as a continuous border along the left hand side.......

Well I do hope that has inspired you to have a play and get out your scenic stamp sets. Remember if you're inspired to create your own Christmas scene, you can enter two projects into the blog challenge - if you use Card-io stamps you will get a second entry.
Until next time......
Hugs Lisa B xx


Love this. Simple but so effective.
ReplyDeleteMy kind of Christmas cards Rosemary! xx
DeleteLoved making this in class. Very simple but looks fab and so easy to change an element or two for variation xx
ReplyDeleteThanks honey xx
DeleteBeautiful card. Thank you for showing us and explaining how you did it. Will give this one a go x
ReplyDeleteThanks Mac Mable, great to hear it is so easy xx
DeleteI love the contempary look to this, great class card xx
ReplyDeleteThanks Jan, yes they all loved making it too xx
DeleteAnother gorgeous scene! Looks simple enough to make, I'll just need a few more stamps...
ReplyDeleteThanks honey, its a great quickie card for this time of year! xx
DeleteI loved this card, that tree set of stamps is great.
ReplyDeleteThanks honey, I think it is a great set too xx
ReplyDeleteSo serene. Absolutely beautiful. Thank you for sharing.
ReplyDelete