Good morning blog visitors, Kirsten here. It's the weekend - yay! It's also rather chilly, which is not so yay. I really am not ready for getting back into socks, boots & coats. Let's not think about it for now.
Sorry there were no posts the last two days. Both Lisa & I have been busy with assorted projects. We got some time yesterday to make some future plans for the blog & as Lisa is going to be extremely busy for the next six weeks or so, (she is going to be taking a VERY well-earned holiday too), I shall be responsible for the blog. I am going to try very hard to post every day, but that might not always be possible.
One of the ideas we spoke about was doing a weekly/fortnightly photographic tutorial. This will be on a separate page & we're going to call it the Thursday Tutorial. We've got some ideas, but we'd also like to hear from you. What would you like to see? Is there a technique you struggle with? Or do you get confused about which inks to use? Leave us a comment with your suggestions & we'll add them to the list.
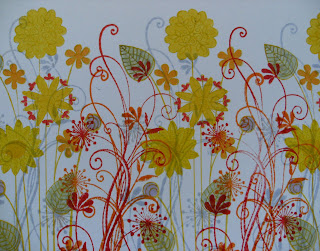
On to today's cards. I was looking through my old Craft Stamper magazines for inspiration & came upon one in the July 2009 issue from Helen Chilton, called Down in the Meadow, so I thought I'd have a go.
It was all about layers of overstamping & I used two stamp sets & black Archival ink on white card. To finish, I stamped the swirl with Versamark embossing ink, covered with white embossing powder & heat set.
Ingredients:
- Kanban Floral Scrolls stamp set
- Kanban Wild Flower Garden stamp set
- Distress inks: Wild Honey, Peeled Paint, Mustard Seed, Spiced Marmalade, Fired Brick
- Adirondack ink: Raspberry
You need a combination of open & solid images to make this technique work. Apart from the swirl, these stamps are open, so I coloured in some of the leaves & flowers with a black, waterproof pen.
I worked away on this card & just before I'd finished it, realised I hadn't taken a single photograph, so I made another one with coloured inks instead.
I used the same stamps, this time with Adirondack inks:
- Watermelon
- Sunshine Yellow
- Sunset Orange
- Cool Peri
I coloured with Spectrum Noir pens as I went this time & stamped with the various inks in different places, building the layers & filling in the gaps.
The border around the edge comes from the bottom of the focal image stamp. If you stamp it off the edge of the card you get just the grasses on the image. When you see this stamp on website, you'll notice the flowers are closer together. I cut my stamp in between the two flowers to achieve the curve. Cutting into our stamps may be shocking to some, but I like to get as many uses from mine as possible & this one stamp can now be used three ways.
I've spent the last two days looking at this card, knowing something wasn't quite right & I've only just realised what it is - I forgot to add some green to the lower third, which would have anchored the flowers. At least it's something I can easily remedy.
That's it for today, thanks for looking. I hope to be back tomorrow. Until then, take care.
Kirsten


No comments:
Post a Comment
We'd love to know what you think, so please feel free to leave a comment. Every one is greatly appreciated.