Good morning crafters! Martina here, this month looking at some designs using some beautiful Card-io stamps. We used some different sets of these in Lisa's last class and all had fun creating our own take on the designs. One of the best things about Card-io stamps is that they all work together, whatever the sets you choose, and the more you have the more quirky little additions you can make!
Today I am looking at how you can use a stamp press to enhance your designs, making full use of the silhouette images in some of the sets and making your life easy along the way! It really doesn't matter which stamp press you use, mine is an older MISTI, but some of the newer designs (such as the one Lisa is stocking called 'Press to Impress') make this a little easier to do and are much cheaper than mine was!
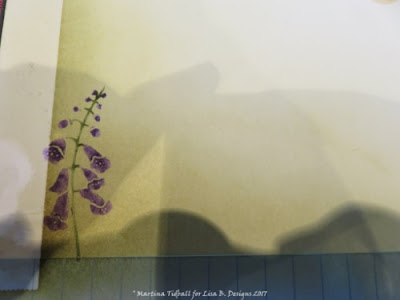
To begin with I chose a 6x6 card blank and masked off a border to the left and a section along the bottom (I did this before putting in the press). I then used a Distress Tool and some Bundled Sage Distress Ink to add some green to the left-hand corner that I had created. I worked from my mask outwards, allowing the ink to fade as I got further out. Once I was happy with the effect, I moved my card into the stamp press and held with magnets.
Now to start building a picture...I started with one of my favourite stamps from the Backyard Blooms Set - the foxglove. Now there are a couple of ways you can do this next bit, depending on how precise you like to be. Me, I like the colours to be exactly on the right 'bit' of the flower, if you're not bothered about that, you can apply ink directly to the stamp for quickness and then simply stamp down into position. My preferred option is to pick up the stamp with the press in the position you want it on your card and then use whichever pens you have to colour one section. I used Distress Markers and coloured the stem green at first, stamped it and then coloured just the petals with purple before stamping again. The press makes this possible as the stamp and card do not move, so you can add colours, details, shading etc. as you like! Pukka! LOVE IT! It also makes you look good, with minimal effort...
Now to repeat the same wherever you want the flowers, building a picture. It is also a good idea to use a 2nd generation of ink to create foliage in the background (you can still put your stamp in position on the press and then either use a lighter pen, or press down onto some scrap paper first and then remove to stamp properly.
I kept building till I was happy with my 'field', before removing the card from the press and the masks.
I edged my stamped section with some dots and dashes using a Micron Pen, before adding a sentiment to the bottom of the card from a Hobby Art Set.
Now to add some quirky bits! I love the bugs from Card-io and there are some different ones in different sets to choose from. The ones I have used here are from the Backyard Blooms and Pleasant Pastures Sets ( I need to add the Bugs and Snails Collection to my stash in the very near future!) Once I was fully 'bugged', my card was finished. And for a change - all in just one layer! Finally, I can send a card with a normal stamp and not a large letter one! This is a VERY rare thing...
That's all from me this week, I will see you next week for some more Card-io fun...
Lisa's next workshop at Grove Green will be on Sunday, August 20. Places are still available and all the information is HERE.
Love,
Martina
xxx


No comments:
Post a Comment
We'd love to know what you think, so please feel free to leave a comment. Every one is greatly appreciated.