Good morning all! So, we had a 'kiss' of snow here, enough to be annoying and icy, but not enough to go sledging! Never mind, next comes my favourite time of year: SPRING!! With this in mind I decided to do a bright and cheerful card for this week...
Now there are a lot of photos in this post, but hopefully these will serve as a better explanation of the 'mechanics' than me typing furiously! Here we go...
First, I took two identical 7x7 card blanks (strong ones!) and on one, folded one side in half again and creased with a bone folder.
I chose a die from my stash that gave me a clear centre point. I secured this in the middle of one side of the card blank using my newly created score line. Once I was happy with the position, I took the other card blank (without the extra score line) and lined this up perfectly underneath.
Once this combination was run through the machine, I had the top card with the shape cut out, and the shape only indented into the bottom one. This was important as I wanted to ensure that all the panels aligned later on.
Taking the top card away and folding the indented blank in half, I used the indention line to position the die back into position and ran it through the machine again.
Now the shape was cut in one side and the bottom was indented. Lining the die up again with the indented side, I ran it through for the last time.
This is what I was left with....bear with me, it will all make sense in a minute!
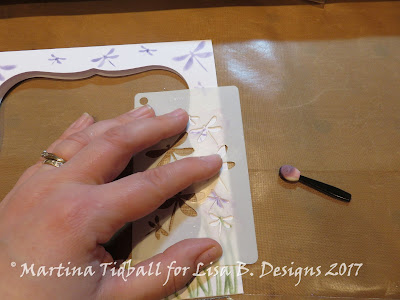
Now to make an acetate panel to fit into the panel in my easel card. I cut some acetate slightly larger than the aperture and secured the Imagination Craft's Daisy and Butterfly Stencil onto it with Stencil Tape. I used several colours of Imagination Craft's Sparkle Medium (Sage Green, Diamond, Pastel Yellow and Lavender) to create the picture, applying it step-by-step. It is a personal preference how you apply it. but I did not want the colours to mix, so I waited for one colour to dry before applying the one next to it. If you want more of an ombre effect you can apply all at once!
Whist the Sparkle Medium was drying and with a clean stencil, I used some Bundled Sage Distress Ink to add some grass detail to the front outside of the aperture.
Using the Dragonfly Flight That's Crafty! Dinky Stencil, I also added some dragonflies with Dusty Concord Distress Ink.
Wanting to make sure there were no blank boring bits showing when you look through the panel, I added some more grass to the back section. To create a 'stopper' section for the card, I cut some coordinating matts and layers and created a matching top layer with the same stencil.
Reaching for my dragonflies, I used some of the same Sparkle Medium as earlier and spread this through onto some more acetate.
Once these were dry, I cut around each one and bent the wings up for some dimension. As the Sparkle Medium is bendy, it is perfect for this!
Turning back to my original acetate panel, I looked at the flowers. I had used Pastel Yellow Sparkle Medium for the middle of the daisies, but I wanted there to be more contrast...
Having a play, I grabbed a yellow Promarker and coloured the Sparkle Medium with it (on the bumpy side not the smooth acetate side). The Sparkle Medium coloured really easily and it allowed me to add some more dimension! Who knew?!!
Final touches - I made a matching panel for the very bottom of the card (you have to write somewhere!)
I also added some inked butterfly detail to the back sections to make it tie-in from all angles.
Now to apply some ribbon, a sentiment from my stash and my little funky 3D dragonflies! )I used red-liner tape to apply the dragonflies).
So, what do you think? (Be kind!) Make sense? I like both these stencils a lot (you may also recognise them both from last week's make too!) They are great all-rounders and you can use them, or parts of, in so many ways!
That's it from me this week folks! Thank you for reading, and look out for Lisa's shows on Hochanda Sunday 22nd January! You might even see a sample or two that I've made!!! OMG!!!
Lots of love
Martina
xxx


Beautiful card Martina!
ReplyDelete