
Hello, Kirsten here with a scheduled post, hope you had a nice weekend. My project today is an
acrylic book from That's Crafty!, I used Imagination Crafts' Santa Claus Art Stamp, Starlights, Sparkle Medium, stencils & chalk paint.
The first thing to say is that acrylic is NOT easy to photograph, so those of you who were at Lisa's classes in Maidstone the other week will have had a much better view of this...........

These books come with two MDF covers, three acrylic pages & three book rings & the idea is to create a dimensional, layered image. You can add as much detail as you choose, I've kept this one very simple.
***When using any of the acrylic products from That's Crafty! always remember to remove the protective sheets from each side first.***
On the first acrylic page I applied Diamond Sparkle Medium through a snowflakes stencil...........

I stamped Santa Claus on to the BACK of the second page of acrylic, using a Stazon Jet Black ink pad. You must use Stazon, it's the only ink that will dry on acrylic/acetate, etc.
(Stamping on the back will obviously reverse your image when you turn the acrylic sheet over, so make sure you work out the position of the image first).
If you stamp incorrectly, or the image is not as clear as you'd like, or you change your mind about placement, remove the ink with alcohol blending solution/alcohol wipes, then wipe the acrylic with a soft cloth & start again.
When the ink was dry, it takes just a few minutes, I began painting, on the reverse again, with Starlights. I began with a very thin layer, let it dry, then added more layers. Doing it that way gives the paint something to grip on to. To highlight Santa's beard & fur trim I firstly added Diamond Sparkle medium with my finger, then painted with Pearl Starlights.

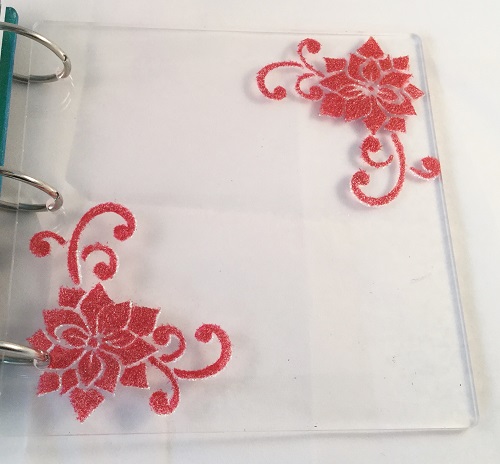
On the third acrylic sheet I applied Diamond Sparkle Medium through the Imagination Crafts' Christmas Poinsettia panel stencil & when it was dry I painted over it with Red Starlights............
On the inside of one of the MDF covers I first blended DecoArt's Escape & Refreshing chalk paints, then I added white gesso through the That's Crafty! Bubbles stencil. I let that dry thoroughly then stamped the sentiment with Onyx Black Versafine - I made the sentiment with part of the Stampendous 'It's Time To Celebrate...' stamp & part of the 'It's Christmas' from the Hobby Art Christmas Frosting stamp set.
I dried the Versafine ink with my heat tool then covered the MDF with Diamond Sparkle Medium by applying it with a brayer..............

On the back of the MDF I had initially applied a green Sparkle Medium through the Holly Corner stencil, but then changed my mind about it, so I painted the cover with Emerald & Rich Gold Starlights, leaving lots of brush strokes on purpose. When the paint was dry I replaced the Holly Corner stencil & added Light Copper Sparkle Medium through it...........

I've decided against using the front MDF cover for now, so here is the finished book again...........


Thank you for visiting the blog today, see you next time.
Kirsten
That's gorgeous Kristen. The effect of the floating snowflakes, Santa... beautiful!
ReplyDeleteThank you very much, glad you like it!
Delete