Hi all, nice to be back after my holiday and off with a bad back, it's still not better and this is the first bit of crafting I've done in over 5 weeks :o)
Today's card is all about the technique we done at the August workshop.
I used my usual 7" x 7" white card and some black card for matting about 5" x 5" then used a piece of white watercolour card cut slightly smaller for embellishing.
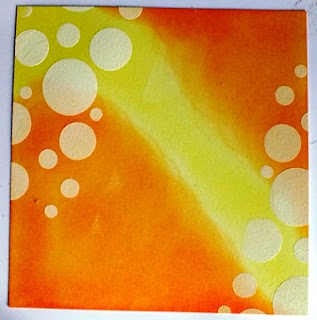
I used the Squeezed Lemonade Distress Ink and a the Mini Ink Blending Tool and flooded the centre of the card with colour before turning to the Spiced Marmalade Distress Ink and done the same on each side and blending it into the lemon, then dried it with the heat gun and left it to one side for about half hour to really dry off.
I then used the Imagination Crafts Bubble Stencil to create the white background, I took a blob of the White Gesso and a make up sponge, making sure it was well soaked with the paint before picking areas I wanted the dots to be and sponging through the stencil.
The next step was to do a little stamping, for this I used the Crealies Bits and Pieces No 3 stamp and randomly stamped over the card using Spiced Marmalade.
I left a space on the left had side of the card to put my image and then carried on using the same stamp but this time using Black Versafine Ink and Wow Clear embossing powder.
I then chose the Sweet Poppy Dotty Flowers Stencil for the main image. I off set the stencil to the left and very carefully, using a piece of Cut n Dry and Black Versafine, I sponged through the stencil until I was satisfied it was well covered. I removed the stencil and used the clear embossing powder again.
At this point I noticed I'd smudged the image so decided to use a butterfly die from my stash and coloured them in using the distress inks and also used the Wow Clear Embossing pad and powder to give them a bit of a glossy finish, thank goodness for our Butterfly Dies :o)
I then matted the image card onto the black matt and placed onto the white and added a small sentiment.
Well that's it for today, see you again next time.
Love Jan -x-


Welcome back but take care with your back
ReplyDeleteThank you for this tut, love the colours and textures.
X
Great tutorial, thank you Jan, just what I needed to get my mojo working again xxx
ReplyDeleteLike the ray of yellow in the middle! Very bright and vibrant xxx
ReplyDelete