Friday, 18 October 2013

Christmas Partridge

Hi there bloggers

Here is another card I made with the 
Hobby Art Partridge in a Pear Tree stamp set
available HERE


I used Versafine Black Onyx to stamp and Promarkers to colour
The square design of words 'Merry Christmas' is a rubber stamp I bought a while back and is 
available from Hobby Art Ltd reference number GR1437G
For some sparkle, I used Stickles Star Dust glitter glue
Sorry about the blurry image below - I need more practice with the camera!!


Partridge in a Pear Tree  Glitter Glue - Stardust  VersaFine Ink pad - Onyx Black    Straight Edge Card Pack 119 x 119mm - White

Have a good week and 
keep crafting

~Suzanne~

Thursday, 17 October 2013

Winter white

 
Hi! It's Georgina with my Thursday post. Today I have a white card to share with you. I have used the lovely Xmas Flower cutting die to create the flower and leaves.
 
I started by creating the card blank. For this I used two leaf embossed scalloped square. These embossed squares are available from Lisa's mobile shop on workshop days along with a lot of other new items. I scored one of the squares as shown below.


I then attached double sides tape along the edge of the scored square and attached the two squares together as show below.

 
 I cut a selection of Xmas Flower and leaves from white card.

 
I added all the layers of the flower together before attached to the card blank. I added a gem to the centre of the flower.

 
To finish the card I added a die cut sentiment and Stickles around the edge of the card, flower and leaves.

 
Cutting and Embossing Stencils - Xmas Flower  Glitter Glue - Stardust

Tuesday, 15 October 2013

Happy Christmas From Norman

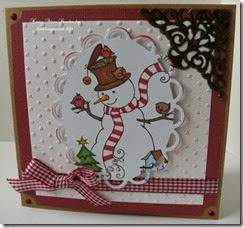
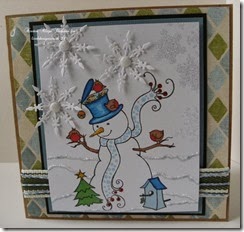
Hello blog visitors, Kirsten here with two cards featuring this happy chap from Hobby Art’s
 Norman & Friends collection of rubber stamps.

001

I stamped twice with Tuxedo Black Memento ink onto smooth white card stock & coloured with Promarker alcohol ink pens.

003

For the first card I dry embossed a square of white card with an embossing folder. Then I used a stencil brush to very lightly apply Festive Berries distress ink. This is an instance where less is most definitely more, so don’t push your brush onto either the ink pad or the card, just sweep it over the top & repeat until you get the look you want.
 
I used a Spellbinders die to cut a shape around Norman, attached him with foam pads & then added the embellishments.
006


This time I used shades of blue & green after finding the patterned paper in my stash. I  heat embossed the white card with WOW Clear Sparkle EP on the snowflake images, but for some reason it didn’t work on the left hand side, so I die cut some snowflakes & attached them with white, glittered brads. I used a blue grey Promarker to create the effect of snow drifts & applied glitter glue on top. This stops Norman looking as if he was floating in mid-air. I used Glossy Accents to highlight a few areas on both cards, such as the star on the tree & some of the diamond shapes on the patterned paper below.
007


Norman and Friends  Cutting & Embossing - Ice Crystal 2  Butterfly Kisses Snowflake Clear Stamp Set  Glitter Glue - Icicle  Glitter Glue - Xmas Red  Memento Ink Pad Tuxedo Black    Nitwit Collection - TW Diamonds Card A4  WS15 Clear Sparkle 160ml  2mm Bakers Twine - Blue Iris & Ivory    Metal Corner Decorative 8 pieces   Mini Glossy Accents


That’s all for today, thanks for looking. Thanks also to everyone who has entered the blog challenge so far, we had two more yesterday. Keep them coming, still plenty of time to join in.
 
Until next time, happy crafting.
 
Kirsten

Sunday, 13 October 2013

More Kraft Christmas Cards

Hello, Kirsten here with an extra post. I hope everyone’s having a nice weekend.
I put together two more, very quick cards while I was waiting for assorted projects of my own to dry & I thought I’d show them to you today.
 
This one couldn’t be easier, three die cut snowflakes , a ribbon & some glitter glue. The greeting is a stamp from my stash.


007


I used the Hobby Art Butterfly Kisses Snowflakes stamp set on this next card. The background was stamped with Versamark ink & heat set with white embossing powder, then Fired Brick & Barn Door distress inks blended over the top. I used a baby wipe to remove the ink from the embossed snowflakes. I used the Joy Crafts snowflake die on the kraft card & added more white embossing & the ribbon.


006
 
 
Butterfly Kisses Snowflake Clear Stamp Set  Cutting & Embossing - Ice Crystal 2  Glitter Glue - Xmas Red  WL01 Bright White 160ml  VersaMark Ink Pad
 
 
Thanks for looking, I’ll be back with my regular post on Tuesday. Until next time, happy crafting.
 
Kirsten.

Friday, 11 October 2013

Hobby Art Christmas stamp

Hi there bloggers

This week I've used the Hobby Art
Partridge in a Pear Tree stamp
available HERE


I've used Black Onyx Versafine to stamp the images on to Neenah Card
 and Promarkers to colour


The black and white background is one of the stamps in the pack which I have used 
in a random pattern with a little bit of Black Soot Distress Ink around the edge


I finished off by matting and layering with some black card and

More Partridge in a Pear Tree to come....

Partridge in a Pear Tree  Glitter Glue - Stardust  VersaFine Ink pad - Onyx Black  Black Soot Distress Ink Pad  Neenah Classic Crest Card Pack by Crafter's Companion    Straight Edge Card Pack 119 x 119mm - White

Have a good week

~Suzanne~


Thursday, 10 October 2013

Hoot Hoot it's Christmas!

 
Hi! It's Georgina again with my regular Thursday post. For my card today I have used the cute Woodware Clear Magic Christmas Hoot stamp available from Lisa B. Designs
 
I begun by stamping the Owl stamp onto white and gingham paper using a Tuxedo Black Memento ink pad as shown below. The gingham paper I used was from the Wild Rose Studio Gorgeous Ginghams papers 6x6paper pack.

 
I cut out one of the owls I had stamped onto the white paper. I left a small white border around the edge. I then cut out sections from the gingham and white paper stamped images and attached then to the cut out Owl. I coloured the beak, feet and branch with ProMarkers.

 
I cut a square of blue gingham paper. I stamped the sentiment, which is included in the Owl stamp set, around the edge of the gingham square.

 
 I attached the gingham square and the Owl to a square card blank. To finish I added Stickles.


CHRISTMAS HOOT  Gorgeous Ginghams Papers 6" x 6" Paper pack  Memento Ink Pad Tuxedo Black  Glitter Glue - Stardust