Friday 30 December 2016

New Home Using Wooden Shapes & Starlights


Hello there crafters, well Christmas Day's over and now looking forward to a New Year.  I hope you had a wonderful Christmas.  Did you get lots of crafting goodies?   I had a couple of things.

So today I thought, as it was the new year, perhaps I could do a new home card using the little Craft Emotions Home Sweet Home Wooden Shapes.


I took three of the little houses to spell out Home Sweet Home and painted the Sweet house with White Gesso before painting with Pearl Starlights, I painted the other two Home houses with Black Starlights.  I took two of the little hearts and painted them with Red Starlights.  I stuck two of the little keys together for dimension and again painted them but this time with White Gold Starlights.  I set them all aside to dry for a while.


Once the houses were dry, I decided to sparkle them up a little with some Sparkle Mediums, Black Stars and Diamond White.  I then stuck some acetate behind the windows, can't see it in the photo, sorry.  Then painted some spare card with the Red Starlights, cut it down to size and placed it behind both the Home pieces.

I took a 6" x 6" inch card blank and matted it with some card I had painted the border with the Black Starlights.


It was just a case of putting the little card together, so using some letter dies from my stash, and painting some spare white card with the Black Starlights. again, I spelt out the words, Your New.  I run the white matt layer through an embossing folder from my stash for effect then stuck the words onto the card.

I 3D the middle house with foam pads and stuck the black houses directly onto the card.  I threaded the little keys with Cranberry & Ivory bakers twine and secured to the back of the card before mounting all the layers together.

Here's a close look at the lettering and 3D piece.


Another very quick and simple card from me for my last post of 2016. 

I hope you all have a great New Year and thank you for all your support this last year and look forward to seeing you all in 2017

Love Jan -x-


Thursday 29 December 2016

Decorated MDF Art for the Home

Hello all! Are you reading this and still trying to get over some Christmas indulgences? I know I am, along with planning all the things I am going to make with the presents Santa left for me! I always find that tea and biscuits are fuel for the imagination, so let that be my excuse for a few more naughty treats...

For my last make for 2016, I wanted to create a piece of art for the home. I have used a Christmas theme, but with minor changes this can easily be modified into any genre you fancy! 


Apologies, I forgot to take a photo here, but once the Starlight Paint was dry, I covered the words with a layer of Imagination Crafts Crackle Medium. I painted quite a thick layer (for bigger cracks) and kept the brush strokes in a vertical motion. The medium is clear, so you don't see anything until dry. The next step was to paint a thin layer of Imagination Crafts White Gesso and wait for the magic to happen...


To bring the colour in slightly and look a little more vintage and rusty, I used some Cut and Dry Foam and Pumice Stone Distress Ink to tint the edges of the letters.


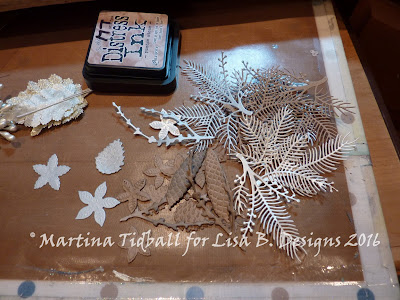
I then turned to my stash and die cut loads of foliage, flowers, twigs etc. in blues, cream, craft card and pearl tones. All were designed to mix and match and bring my colours together. I could not find the right blue at the time, but no problem, a coat of the Starlight Paint on some card and the perfect match was made.


Lots of deliberating later, some other odd bits from my stash and hot glue...


At this point I wanted to add some more interest to one of my letters. I should have really done this before sticking all my embellishments on, but when does that logic happen in real life? Certainly not for me anyway! I thought I needed some sparkle so I turned to my old faithful: Sparkle Medium. I wanted a colour that would compliment nicely, so used Welsh Gold. I chose a snowflake stencil and positioned over the letter 'O', masking off the other areas with Repositionable Tape.


You really can't beat the effect of Sparkle Medium...


So the whole piece is complete, with just a few additions that say 'Christmas'. Take away the snowflake stencil and some of the foliage to create a piece for all year round. The crackle effect is classic and timeless along with being easy peasy to do! (bonus!!)


My last post for the year! My goodness, what a year it's been. Crafting is a refuge for most of us, and with the current trend for 'adult colouring' I think the world is catching on...

Thank you so much for reading my posts throughout the year and taking the time to leave comments (so I know I am not alone!) I wish you all the best for 2017; may your year be happy and healthy and I look forward to working (and playing) with you in the crafty future!

Love
Martina
xx

Home Wooden Stand up Word Mediterranean Sky SLWelsh Gold SM Repositionable Tape Cut-n-Dry Foam Crackle Medium White Gesso

Monday 26 December 2016

Winter Hugs


Happy Boxing Day! Kirsten here with a quick, scheduled, blog post. I hope you had a lovely day yesterday. This is a That's Crafty! greyboard postcard that I decorated with Imagination Crafts'
Art stencils & Starlights paints.................


I painted the postcard first with my fingers, using a mixture of white gesso & Deco Art's 
Chalky Finish paint; Escape. Then I added layers of stencilling, using various colours of Starlights, including Rich Gold, Blue, Turquoise & Pearl....................


The Imagination Crafts' panel Art stencils have lots of different areas to stencil through, so you can build layers very quickly & easily, then use another area for the focal image. 

I finished the postcard by stamping the greeting from the Hobby Art Christmas Frosting stamp set, stamped with Onyx Black Versafine & heat set with WOW! Clear Gloss embossing powder..............


MU42 IMST MU43 IMSTMU17 IMSTPostcards - White/GreyboardAmericana Chalky Finish Paint - EscapeChristmas Frosting

Clear Gloss Regular WEP    VersaFine Ink pad - Onyx Black    


That's it from me for today, have a great week & a wonderful New Year's Eve & New Year's Day. 

Kirsten

Sunday 25 December 2016

Merry Christmas Everyone.......


Good morning my lovelies,

Image result for free merry christmas images

Image result for free merry christmas images


I do hope that you have a lovely day planned ahead with your families and friends and for those of you who do not have family or are going through a difficult time this Christmas, my heart goes out to you and I send warm wishes and hugs and hope that 2017 will be a better year for you all.

We have a lovely day planned with Paul's mum today and tomorrow I go off to see the rest of my lovely family and spend time with them. It is at this time of year especially, that I do feel very blessed to have them in my life.

So as it is Christmas Day and I don't want to keep you too long. I thought that I would do a quick post to wish you all a Happy Christmas and show you something that I got around to making a couple of weeks ago.......

You know how it is......you gather up more Christmas stash every year, I buy more bits and tell myself that I am going to make something special for myself as a decoration for Christmas and every year I have no time left!!!!

Well this year a few months ago I bought a lantern in one of my wholesalers and said to my sister Jo as I was with her, 'I am going to do a little scene inside this for Christmas'.....

Well do you know what.........this year I got around to it!!!!!!!!!!!!!!!

I know...... miracles do happen, even at Christmas!!

So with a lot of work and effort,  I turned this:


And this:


Into this.........

But it was worth every minute I spent on it..... 


Here is a little closer look......


I absolutely loved making this, It is just great to take a normal item and alter it into something completely different. 

Yes I could have just put a candle inside it but no, I wanted to make it a bit more special than that and I feel it is.......

I love it lit up at night in my lounge next to me........


Let me know what you think.

Well all that is left to say is have a wonderful Christmas and I will be back soon.....

Festive love and hugs
Lisa B xxx


Friday 23 December 2016

Starlight, Sparkle Medium and a little upcycling


Hello all, I hope all your Christmas preparations are almost done and your ready for the big day.

It's a little something different from me today, I had this candle lamp that I wanted to decorate so I hope you like it as a change from cards.

Before

 
After


So I painted the wooden lamp with Black Starlights that I put on with a wide brush and mixed with a little water and left to dry.

 I then dabbed it with a little Gold Shine Sparkle Medium.


I cut a few Poinsettias from a die in my stash using the Pure White Vellum.  I then painted the little MDF Robin using Topaz Starlights and Red Starlights, which I stuck onto the lamp using a hot glue gun, then placed the poinsettias and the project was done.


Very quick project today as I'm still doing all the prep for my own Christmas and that's taking a lot of time at the moment.

Merry Christmas to you all, I hope you have a wonderful time, see you again next week.

Love Jan -x-