Showing posts with label Imagination Craft Crackle Medium. Show all posts

Thursday, 22 June 2017

MDF Uprights, PaperArtsy and a Rebellious Hare!


Good morning all, Martina here with a look at how one of the MDF pieces I created for Lisa's PaperArtsy workshop came to life...

I was rather keen to experiment with the gorgeous array of MDF uprights that That's Crafty! have produced of late, so Lisa let me loose on couple to have a play! At first, I have to admit I was a bit scared; I think it's that whole thing of it being MDF rather than cardstock (although cardstock still worries me if I muck it up and it was good card!) I was overthinking the whole thing really, but I guess we have to start somewhere...

I am going to have to talk you through the first stages, apologies, I cannot find the photos I took, I think the gremlins must have visited...

The first stage was to paint the whole MDF Scalloped Tag piece (assembled) with one layer of Sax Blue Starlights. I then coated the front of the piece with a thick layer of Imagination Crafts Crackle Medium and set aside (you can heat dry, but I honestly think it looks better when you leave paints and crackles to their own devices!). Taking a thick brush primed with Media White Gesso, I swiftly covered the whole of the front of the tag, using vertical brushstrokes and not going over, or back over any areas. This is important, as the crackle reacts with the paint so quickly that going over it again makes it peel and move, giving you lumps.

At this point, I had a tag with the front crackled in white and a hint of the Sax Blue Starlight showing through... Now for the stamping! Huzzah!
Using PaperArtsy JOFY 50 (catchy name!) I stamped the flowers, leaves and grasses several times on my tag front, ignoring any overlapping. I stamped in Forest Moss Distress Ink and then heat embossed with Wow Clear Detail Powder to seal it. At this point I should be honest: I think it would have looked better if I had used black ink, but I thought I would keep going anyway... a lesson for next time!


Now to sort out the messy flowers and overlapping! Taking some Watercolour Card, I sprinkled some Blackcurrant Infusions over the top and then spritzed with water. I varied the intensity of the water and then let the card dry. Using Black Onyx Versafine I stamped the flowers again and then cut the blooms away to be used on the tag. I repeated this process to make some blue flowers, this time using some 'In the Navy' Infusions and also some flower middles using 'Lemoncello'.


Once all my blooms and centres were cut, I started to arrange them on my piece. I did not want them to fit over the tops exactly, so I had a play. My thought was that the petals that were stamped directly onto the MDF would be in the background, so I would colour these straight onto the crackled paint; they would be 'flat' compared to my cut-out dimensional ones (if that makes sense).


I had a few extras, so I just kept playing until I was happy...


Now to make the piece a little more dimensional! I love the quirky 'bushes' that are on the JOFY 50 set, so I thought I would see if they could stand up at the front. I stamped them onto some thick card and then cut out leaving a wide 'tab' at the bottom. I coloured in with Distress Inks (Forest Moss and Bundled Sage) and then folded the tab in half. I glued the bottom section, tab down, onto the MDF a little away from the main upright. I liked it, but it needed a character to pop out...cue a  Hobby Art March Hare!

I stamped, coloured and cut the hare from some card and did the same with the butterfly and the words from the JOFY 50 set (I stamped the words onto some leftover Infusions card from earlier).


There we have it: Harold (?!) the Hare is being a rebel, and why the devil not in this day and age?!

I think stamping in the black at the beginning would have still looked better, but hey ho, nobody knows that, do they?

 Lisa is taking bookings for the next two workshops at Grove Green. You can find the information about them HERE and there are still places on the July classes, information HERE.

Love,
Martina
xxx

Infusions - Blackcurrant Infusions - In The Navy Infusions - Lemoncello JOFY50 - NEW for 2017 MDF Upright - Scalloped TagCrackle Medium Sax Blue SLMedia Gesso - WhiteBundled Sage - MiniMarch HaresClear Gloss Superfine WEPVersaFine Ink pad - Onyx Black Watercolour Card


Wednesday, 15 March 2017

Hobby Art Funky Bird with a Splash of Colour.......


Morning all,

How are we all today?
I have to say I have been so busy lately, nothing new there then!
I have been struggling a little with my fibro this last week but thankfully I am coming out the other side of it now as I am heading off to the NEC today to help set up the stand with my lovely soul sister and brother from Imagination Crafts, Sue and Harvey.......

It is the spring Hobby Crafts Show from 16th -19th March at the NEC and we are on stand A12, so if you are attending please pop by and say Hi.

So it's a quick post from me for today.......

So I thought that I would show you one of my favourite pieces that I made for the last class using the gorgeous Funky Bird and flowers from the Nature Reserve stamps set. I love all the new sets but have a real soft spot for the funky bird.....

I used a white/grey board postcard from That's Crafty and created a crackle background on it. I am not going to go in to detail today of how I did it, as I am short of time and I am going to do a tutorial next week on the blog with a canvas and show you how to create it from scratch.
I used the Imagination Crafts bubble stencil on the background to add some depth with white gesso and stamped some leaves and daisies from the Nature Reserve stamp. I used Versafine Black Onyx and clear embossing powder.

I repeated the daisy heads on to a piece of watercolour card and also stamped the Funky Bird and embossed them both with clear embossing powder and then coloured them in with watercolour pens....


After cutting them out, I then stuck the daisy heads on top of the stamped images on the postcard and 3D'd the bird on to the card. 


I finished off by stamping some textured dot in black ink around the edge of the postcard and embossing them, these were from the Hobby Art Textures set.
Once I added some white dots with a white pen on his wings and matting it on to black card I was done......

Let me know what you think, I really liked making this one.

Have a great week and hopefully I will see some of you at the NEC.

***On the website, some Hobby Art stamp sets have been reduced in price by 25% - 40%.***

Love and hugs 
Lisa B xxx

Funky Bird HA - NEW!!  Janie's Collection - Nature Reserve HA - NEW!!Textures HA

VersaFine Ink pad - Onyx Black   Bubble Background IMST  Postcards - White/GreyboardClear Sparkle WEG


Monday, 10 August 2015

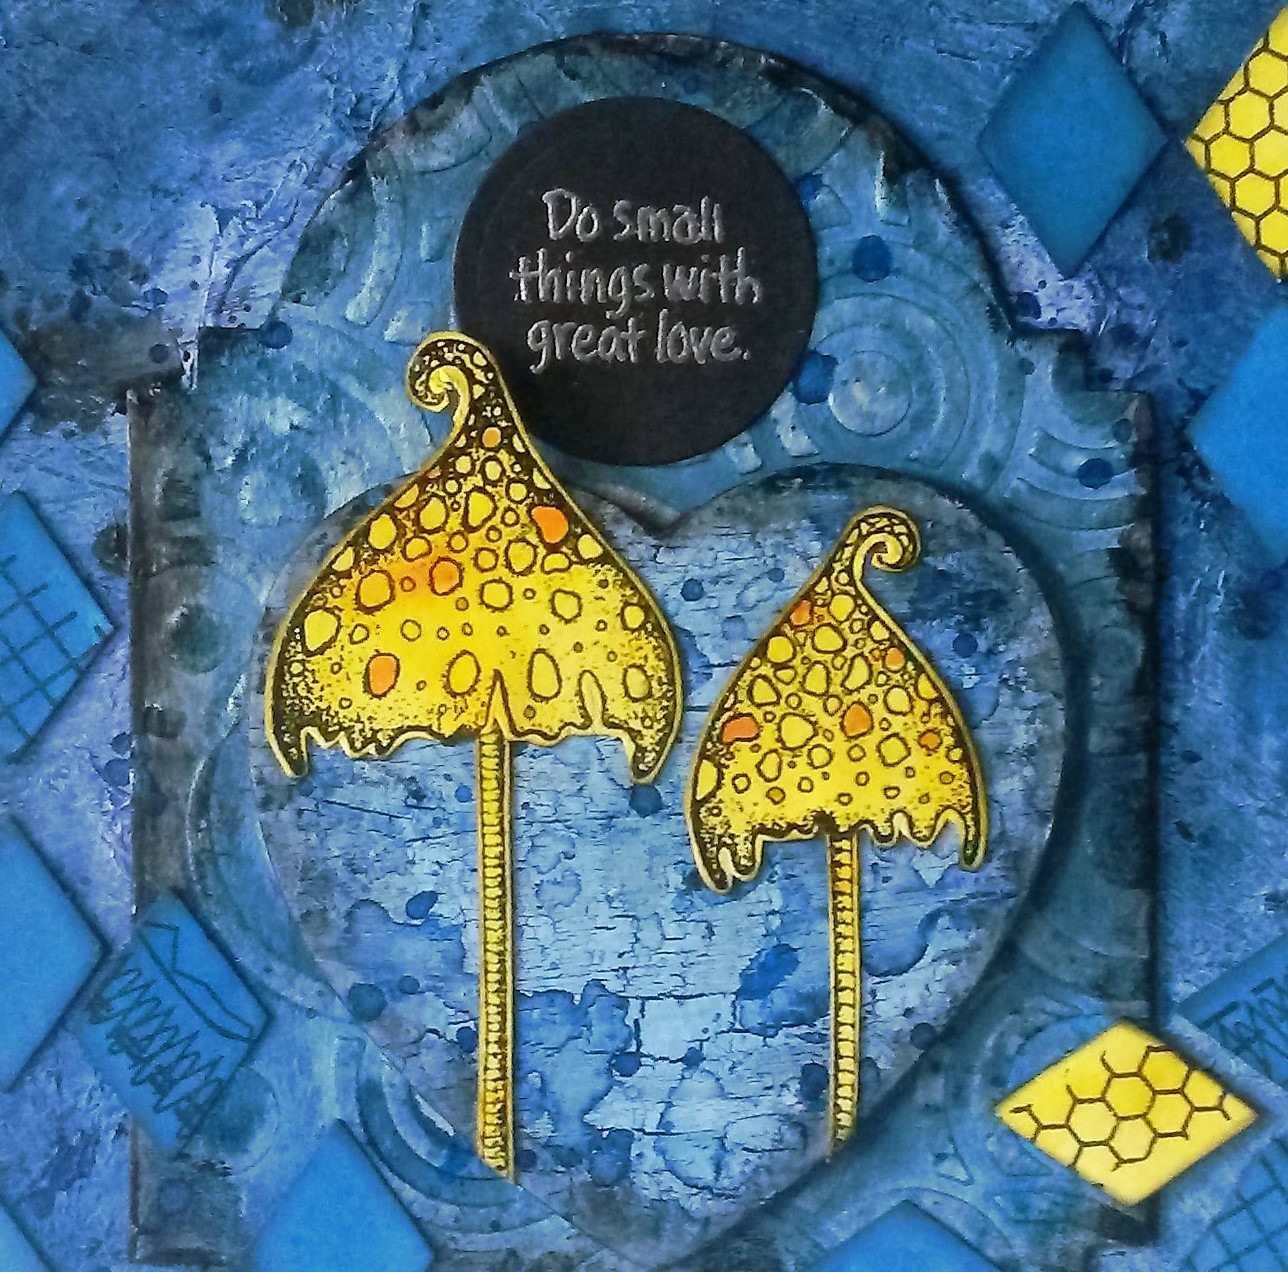
Lavinia Stamps & Brusho Wall Hanging


Good morning, hope you've all a nice weekend, the weather was certainly gorgeous. The first of my Lavinia Stamps & Brusho samples for this month is a wall hanging................


There are three layers to the wall hanging; a square of chipboard covered with patterned paper & crumpled tissue paper, a piece of die cut chipboard painted with white gesso & Sweet Poppy Pearlescent dimension paste applied on top through a Pronty stencil & finally, an MDF heart painted with black gesso first, then Imagination Crafts' Crackle Medium brushed over that & Cobalt Blue Brusho mixed with white gesso over the crackle............


The chipboard pieces were painted with layers of Cobalt Blue Brusho mixed with water, drying in between layers to build depth up the colour...........


When they were thoroughly dry, I edged everything with tiny amounts of 
black gesso on a baby wipe, glued the three pieces together with 
Cosmic Shimmer Dries Clear glue & added splatters of Brusho Blue Shimmer Spray.

I painted a piece of scrap watercolour card with Yellow Brusho & stamped the Spotty Toadstools on top with Onyx Black Versafine, heat embossed with 
clear embossing powder & cut them out. 

I painted the waste from a piece of Anna Marie die cut A4 Trellis card with Yellow & Cobalt Blue Brusho, stamped a few of them with the Limor Webber Rugged Edge stamp set & edged them all with Black Soot distress ink..............


I stamped the quote from the Stampendous 'Life Words' stamp set onto a die cut circle of black card with Versamark & heat embossed with silver embossing powder. I attached two mini hinge clips to the top & tied a piece of ribbon from my stash to each one............


Spotty ToadstoolsRugged Edge   Brusho Crystal Colours - Starter Pk 2 Pk of 24    Shimmering Blue   Circles 1 Life WordsMedia Gesso - Black  Media Gesso - White   Dimension Paste - Pearlescent  Crackle Medium  MDF Hearts - Set of 4 Mini Hinge ClipsDie- cut Trellis Card Watercolour Card Black Card VersaMark Ink Pad   VersaFine Ink pad - Onyx Black   WC05 Metallic Silver  WA01 Clear Gloss  Black Soot Distress Ink PadCosmic Shimmer Dries Clear Glue 125ml 

That's it from me for now. You can see photos from Friday's classes in 

The theme for the new blog challenge is, of course, Lavinia Stamps & all the information can be found on the challenge page

Have a great week.

Kirsten