Hi there all, hope you're all doing ok.
Today's little card is another easel, I'm enjoying making these at the moment. But this time going a bit shabby chic with the Imagination Crafts Rice Papers and my take on last Friday's workshop.

So using the materials from the class pack I cut out the large butterfly roughly then glued onto some white card using the Imagination Crafts Magi Bond, I love this stuff, then cut it out and left to one side.

Next I chose a few elements from the rest of the Rice Paper .
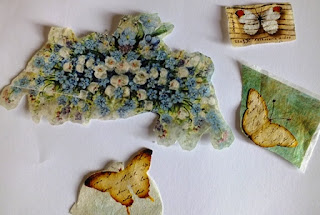
I then took the ready cut background card and glued them randomly into place using the Imagination Craft Magi Bond. I left that all to one side to dry off.

Next I prepared the easel in the normal way by taking a 7" x 7" card and folding the front in half then cutting a piece of white card the same size as the card to add the image to and would be the upright of the easel card.
The base of the card I cut a another piece of silver mirri card the same size as the supplied piece and covered it with some Imagination Crafts Rice Paper leaving a border of silver showing.

I went back to the main feature of the card and embossed using the Crafter Companion 3D Regal Swirls Embossing Folder.

Very nice, these 3D folders are brilliant.
To make the embossing stand out more I used Antique Linen Distress Ink, the same way as in the class, and lightly blended the colour avoiding the Rice paper elements. So rather than use the foils I thought I'd give it it's drama by just using Sparkle Mediums. I went over the whole image with Imagination Crafts Sparkle Medium Silver Dollar then Blue Moonstone using my finger to apply the medium which gave it the occasional foiled look anyway . I did the same on the wings of the butterfly.

I decorated the butterfly with the little embroidered sample and added the flower we had in our packs.


 Well that's it for today, I hope you enjoyed the blog today, I must admit the Rice Papers are one of my favourites to use and there are so many to chose from, you could use any to create a card like this weeks.
Back again next week
Love Jan -x-



Next I chose a few elements from the rest of the Rice Paper .
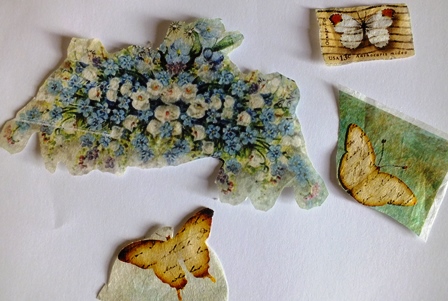
I then took the ready cut background card and glued them randomly into place using the Imagination Craft Magi Bond. I left that all to one side to dry off.

Next I prepared the easel in the normal way by taking a 7" x 7" card and folding the front in half then cutting a piece of white card the same size as the card to add the image to and would be the upright of the easel card.
The base of the card I cut a another piece of silver mirri card the same size as the supplied piece and covered it with some Imagination Crafts Rice Paper leaving a border of silver showing.

I went back to the main feature of the card and embossed using the Crafter Companion 3D Regal Swirls Embossing Folder.

Very nice, these 3D folders are brilliant.
To make the embossing stand out more I used Antique Linen Distress Ink, the same way as in the class, and lightly blended the colour avoiding the Rice paper elements. So rather than use the foils I thought I'd give it it's drama by just using Sparkle Mediums. I went over the whole image with Imagination Crafts Sparkle Medium Silver Dollar then Blue Moonstone using my finger to apply the medium which gave it the occasional foiled look anyway . I did the same on the wings of the butterfly.

I decorated the butterfly with the little embroidered sample and added the flower we had in our packs.

I matted all the layers together by first placing the main image onto the blue basic Bazzil card stock then onto the silver mirri before sticking all onto the upright of the card. Then using double sided tape and a little cosmic shimmer I set the upright into place.
The last things to do where to add the easel block that makes it stand up, so cut a piece of the same basic Bazzil card and 3D it placing it about a third of the way up the base of the card, then added a little sentiment.
I then wanted to use the Imagination Crafts Clematis Elements stamp set to create 3 flowers, so I glued some Rice Paper onto some white card, leaving to dry before stamping 3 large and 3 small flower heads with Versafine.

I cut them all out and glued the smaller flower head inside the large, shaped them with a ball tool and place a blue gem in the centre of each. I don't like throwing away any waste so I cut out two little butterflies and placed them on the base of the card to finish it all off completely.


Back again next week
Love Jan -x-


