Showing posts with label Encrusted jewel kit. Show all posts

Friday, 8 September 2017

Reindeer Dies & Sparkle

Hi there crafters, it's Friday again and my little offering for the blog.
 
A nice simple little card today but using some super little Marianne dies we worked with at the September class last Friday.
 
 
Using a 6" x 6" white card, I taped around all four sides of the card using double sided tape.
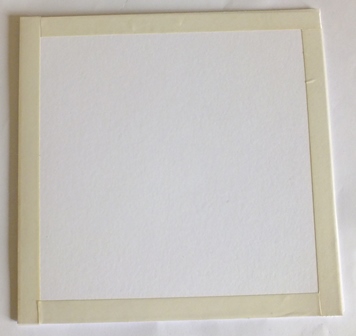
 
 
Then I burnished some fine glitter from the Encrusted Jewel Kit onto the tape.
 
 
Next came some matting and layering, I used some sparkly red card from my stash, then created a white sparkly matt by using Woodware Double Sided Sheets and the glitter again.
 
 
Next I die cut the dies as follows using the red sparkly card again:
And a sentiment from my stash
 
 
Once I'd cut the dies I ran them through again using the embossing mat to create the detail.
 
Next was to put the card together by matting the white sparkly card onto the red then onto the main card.
 
Using Cosmic Shimmer Dries Clear Glue I placed the little ivy die cut into the corner and then the sentiment before deciding where the reindeer where going to go.


I decided I wanted to flat mat the female reindeer and double 3D the male reindeer with  Mini Mount Pads. You can see the shadow it created in the next photo
 
 
Voila all done, as I say nice quick little card to batch make for Christmas I think.
 
I'm looking forward to the Paper Artsy class on Saturday I hope some of you are there too.
Take care and see you again very soon
Love Jan -x- 


Thursday, 5 March 2015

Versafine Ink Background & Tando Mini Printer Tray


Morning everyone,
Today I'm picking up my post from last week and showing what I did with the


Firstly I glued the three frame parts together, leaving the back to one side for now.
Then I used Stampendous Fran-tage,
I chose the pink glitter from one of the Encrusted Jewel kits.
Applying Versamark helped fix the glitter while I heated it
with a heat tool to melt and set it in place.


It does blow around so you can do this part in a box or tray,
 it's a bit off trial and error to find the best technique for yourself.
Normally on a card you'd heat from underneath and I did do that too and
 then when it started melting you can heat from above.
I used the glitter all over the front and sides of the glued frames.


Next I cut a piece of stamping card to fit behind the window section and
 on top of the back piece of grey board.
Using the Butterfly Collage stamp set from Artemio I stamped the main image using
Versa Color in Rose Red and embossed with clear embossing powder.
Then with the remains of ink left on a piece of cut and dry that's
 used for pink/red ink pads,
 I blended colour over the piece of card.


Going back to the frame I then painted the remaining exposed areas with
Martha Stewart Bubblegum Pink paint and glued the printer tray
 and stamped card section together.
I chose four of the other stamps from the same set, stamped and clear embossed using the
Versa Color Rose Red again on the butterfly and postmark and 
the Orchid colour for the dragonfly and stamp.


After cutting out I shaped the pieces to give dimension and
 used foam pads to secure in place.
The stand for the tray has also been painted.

So there you have it, this cute feminine printer tray that would make a lovely little gift.
Hope this inspires you to create with one of these trays.
Thanks so much for stopping by today.
 
Crafty hugs xKx

Mini Printer Tray 103mm x 103mm with stand   Embossing Enamel   Versacolor Rose Red Versacolor Orchid  

       Versamark Ink Pad  WA01 Clear Gloss  Bubblegum  Cosmic Shimmer Dries Clear Acrylic Glue - 30ml

Tuesday, 4 November 2014

Oh Christmas Tree

 
Good morning crafters, happy Tuesday. I'd like to show you my final project from last month. Lots of photos in this post, so I will try to keep the words to a minimum.................


Lisa has these cones for sale at the monthly classes, 65p each if I remember correctly. I painted mine with gesso first........


Randomly stamped the Woodware Clear Magic Forest stamps with a permanent green ink onto tissue paper & heat set - heat setting prevents the ink from bleeding into the tissue............


Used Mod Podge to stick the tissue paper onto the cone, working in stages & crinkling it as I went. Brushed a thin layer of Mod Podge over the tissue paper to seal it & left it to dry thoroughly..........


Used Cosmic Shimmer Dries Clear glue to attach a length of Diamond Mesh to the cone............


I covered a sheet of white card on both sides with Diamond Sparkle Medium & when it was dry I die cut the stars...........

 
Stuck them to the cone with hot glue.............


The base is an empty spool, painted with gesso & edged with silver paint. I stamped
 Hobby Art's snowman, Jasper, with Onyx Black Versafine onto white card, coloured him with watercolour pencils & cut him out............


I decorated the base with tiny vials, a silver poinsettia from my stash & shaved ice fragments from the Fran-tage Encrusted Jewel Kit...............


The finished tree again.................


Forest  Jasper The Snowman   Sparkle Medium Diamond  Encrusted Jewel Kit1/2 metre of silver Diamond Mesh
 
    Small Glass Vials 12 pcs   Medium Glass Vials 10 pcs     Cosmic Shimmer Dries Clear Acrylic Glue - 30ml  
 
 
Thanks for looking & for all the kind comments this month, Lisa, the rest of the DT & I really appreciate them.
 
The blog challenge is open until 11pm on Saturday night, so there's still time for you to enter. Visit the challenge page for all the details.
 
Friday is class day in Maidstone & once again, I will be running the classes, along with Jan, Kate, Rosemary & Jo. We will be bringing reduced stock, so please let us know as soon as possible if there's anything in particular you need. As always, the shop will be open from 2.30 to 9.30pm so feel free to drop in.
 
To those attending the classes....
 
Remember to bring a palette knife please!
 
We will have a few spare ones, but there won't be enough for everyone.
 
I think that's it or now. If you've any questions/queries/thoughts please contact Lisa or myself via here on the blog/email/Facebook.
 
Until next time, happy crafting
 
Kirsten


Monday, 3 November 2014

Blue Christmas

 
Morning, it's the start of another week & I have the last of my October sample cards to show you.
 
For this card I stamped the Woodware Clear Magic Forest stamps with Atlantic Versacolor ink & heat set with WOW Clear Sparkle embossing powder. The pattern card is Hobby House's 'Check' from the Snowflake Flurry collection. The sentiment & snowflakes were heat set with
metallic silver embossing powder..............


Another piece of Hobby House patterned card for this card, this time it's the Pink Snow card from the Let It Snow collection. The trees were stamped onto white card with clear embossing ink & heat set with Clear Sparkle EP.......
 
To make the snowy hill, I cut a piece of white card, covered it with wet, tacky glue & covered that with the shaved ice fragments from the Fran-tage Encrusted Jewel Kit & left it to dry overnight....


Forest    Let It Snow    Snowflake Flurry    Encrusted Jewel Kit   Versacolor Atlantic
 
1/2 metre of silver Diamond Mesh   WS15 Clear Sparkle    WC05 Metallic Silver    Emboss Ink Pads    VersaFine Ink pad - Onyx Black
 
Thanks for looking. I have one more project to show you & I will be back with that tomorrow.
 
Kirsten