Thursday, 22 August 2013

Emily and Ted patchwork

 
Hi! It's Georgina again with a new card to share with you. For this card I used the cute Emily and Ted cling stamp and Blackberry Lane 6x6 paper pad both by Wild Rose Studio, and available from Lisa B. Designs.
 
To make this card I started by stamping the image onto smooth white card and patterned paper with a Tuxedo Black Memento ink pad. I chose different patterned papers for different areas of the image. From the Blackberry Lane paper pad I chose a flower paper for the top and leggings, a pale blue paper for the dress and a green/brown paper for the teddy.
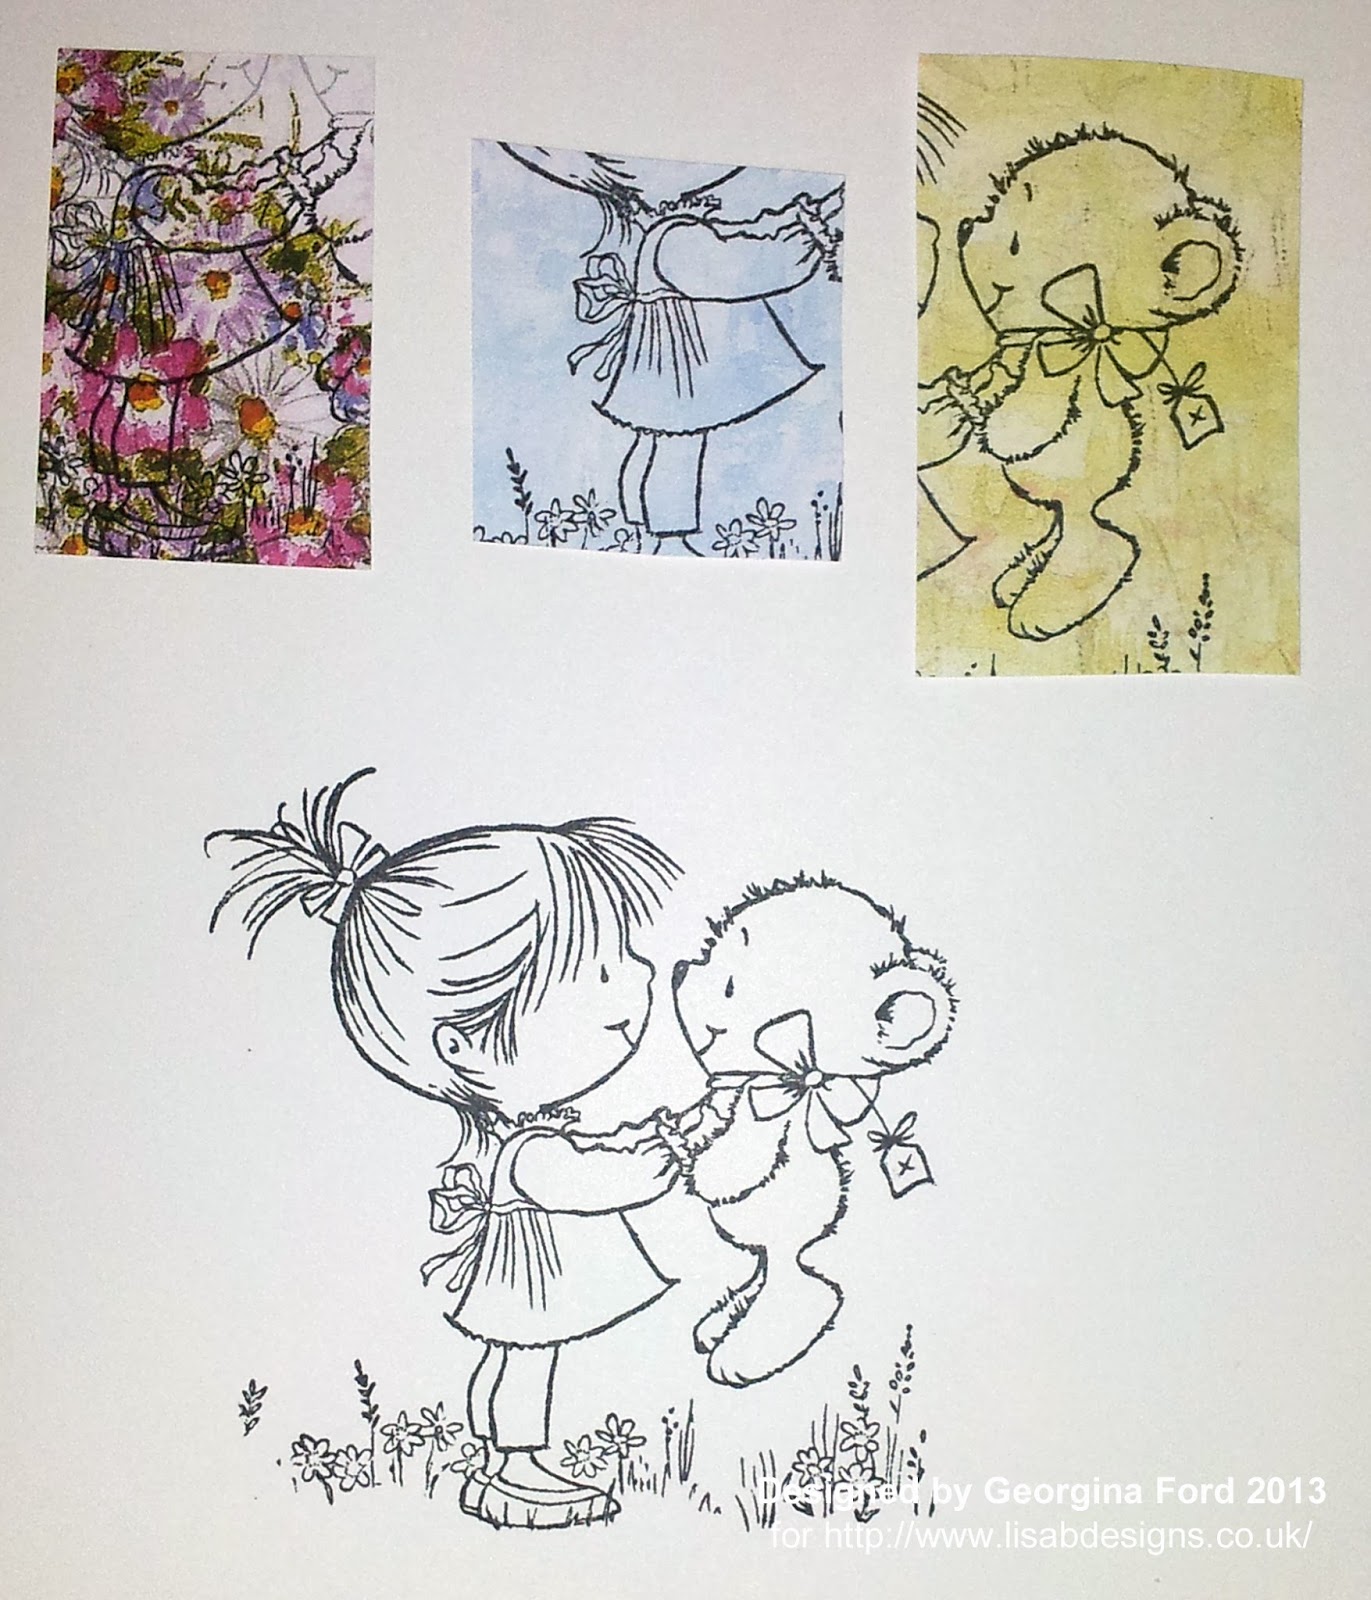
 
 
I coloured the hair and skin sections of the image with ProMakers. I then cut the other sections (dress, top, leggings and teddy) from the patterned paper and attached them to the coloured image. This technique is called Paper Piecing. I coloured teddy's bow with a red ProMarker. For added sparkle I added Star Dust glitter glue to the flowers and teddy's bow.

 
I then cut a piece 10.5 x 11cm of white card. I also cut a selection of 2x2cm squares of different patterned paper again from the Blackberry Lane paper pad. I added the small squares to the white card to form a patchwork effect.

 
Once the patchwork was complete I added the coloured image onto it. Around the edges I added faux stitching with a black fineliner pen (as shown below).

 
I punched two holes in a die cut sentiment. I thread pink ribbon through the holes before adding to the patchwork image panel. I then attached the completed panel to a 119x119mm white scalloped card blank. To finish the card I added white Card Candi, which I also added Star Dust glitter glue too.


Emily with ted   Blackberry Lane 6" x 6" Paper Pad   Memento Ink Pad Tuxedo Black   Glitter Glue - Stardust
 

Tuesday, 20 August 2013

Techniques on Tags

Hello, Kirsten here with a little tag book to show you.  I love manila tags, they’re perfect for trying out techniques & colour palettes & If I don’t like the finished tag, I cut it up & stick bits in my art journal. 
 
 
024
 
I decided I would use only these Adirondack inks.
 
002
 
I scored the tags about a third from the end, this makes the fold on each ‘page’.
 
001


015
 
1 Apply white acrylic paint to the stamp with a tapping motion, building up a paint layer slowly, not too thick.
2 Stamp on the tag & allow to dry/dry with heat tool.
Blend assorted inks on top.
4 Wipe the paint with a clean baby wipe, removing the ink.  (Adirondack inks won’t dry on paint, so you have plenty of time).  Dry thoroughly.
 
016
 
1 Use a blending tool with a foam pad to apply the ink through the stencil.
2 Blend other colours on top.
3 Stamp with grey ink, then again with black ink on a different stamp.
4 Add highlights with a black, waterproof pen.
 
 
022
 
 
017
 
1 Mask off the centre with a die cut circle.
2 Blend assorted inks around the outside of the circle.
3 Stamp with black ink & add doodling with black & white pens.
 
018
 
1 Stamp with embossing ink & heat set with clear embossing powder.
2 Apply inks.
3 Wipe the embossed areas with a baby wipe.
 
021
 
019
 
1 Blend light coloured inks over the tag.
2 Apply a darker ink though the stencil.
3 Stamp with a contrasting ink THROUGH the stencil.
4 Stamp focal images with black ink, add white highlights.
 
008
 
 
020
 
1 Stamp the quote on the tag, wait a few seconds then spritz with water, wait again, then dry.  The water makes the ink run.
2 Swipe two different inks onto your craft sheet & spritz with water.
3 Drag the tag though the inks, spritz tag with water, repeat until you’re happy with the coverage then dry with a heat tool.
4 Spritz tag with gold mica powder mixed with water, dry.
 
023
 
1 Blend inks over the tag.
2 Stamp with grey ink & focal images with black ink.
3 Splatter the gold mica powder & water mix on top, dry.
4 Put your tags together & attach with brads.
 
Phew!  If you’re still reading, I thank you.
 
Adirondack Brights Pads Pool  Adirondack Brights Purple Twilight  Adirondack Brights Raspberry  Adirondack Brights Sunset Orange  Adirondack Brights Sunshine Yellow  Adirondack Brights Watermelon Red  Indigo Blu 'Harlequin – Background' Rubber Stamp  Vintage Flourish - Dinkie Rubber Stamp  Cloud Mask - That Special Touch 6" x 6"  Watch Mask - That Special Touch 6" x 6"  WA01 Clear Gloss 160ml  Acrylic Dabber Lights Snow Cap  London Fog Memento Ink Pad  Emboss Ink Pads  VersaFine Ink Pads Crafts Too Vintage Selection - Brads 140 pcs  Iridescent Mica Powders - Brights (12 Colours)
 
 Until next time, happy crafting.
 
Kirsten

Monday, 19 August 2013

Emily with Dandelion gift tag

Hi, it's Georgina again with an idea for a cute little gift tag. 
The tag would make a pretty addition to any gift bag or wrapped gift. 
The stamp I used for the tag is Emily with Dandelion cling stamp by Wild Rose Studio, available from Lisa B. Designs.
 
 
I started by stamping the cute image with a Tuxedo Black Memento ink pad onto smooth white card and also a kraft tag.

 
Around the edge of the tag I drew faux stitching with a white gel pen. I also added Star Dust Stickles glitter glue to the dandelion.

 
I coloured the image that I stamped onto the white card with ProMarkers. I cut out Emily and the cat, and attached them to the kraft tag.

 
To finish the tag I added a die cut scalloped sentiment and pink seam binding ribbon.


Emily with Dandelion   Memento Ink Pad Tuxedo Black    Glitter Glue - Stardust

Saturday, 17 August 2013

Co-ordinating Card Making Kits.......

Good Morning All,
 
 
Apologies it has been a while since I have blogged, I have been very busy working on other things!!
Coming soon??

Thankfully the girls have been great bringing you lots of fantastic inspiration......
 
Anyway, I thought I would show you today some of my Brand New Cardmaking Kits that I have put on the website .
 
Do you have trouble planning and co-ordinating your cards?
 
For a long time now, a lot of you have been asking me to do kits for some of the samples that I make, so I have put some kits together but they are very limited in numbers.

But when they are gone they are gone!

The first kit is the:

 Beach Themed Card Making Kit

 
This lovely cardmaking kit comes complete with an inspiration sheet with 5 card samples pictured on it.......

The kit contains £20.00 worth of craft goodies for the great price of £10.00


This kit contains:
10 shaped cards and envelopes
5 x A4 sheets of coloured card stock
3 x A4 printed backing card stock
2 x A4 printed and foiled backing card stock
3 x A4 die cut beach toppers
extra die cut toppers
die cut co-ordinating messages
die cut shells
4 x flowers
5 x ribbon, lace and trims

The only extra thing you need to add is glue, glitter and a little imagination!

These are the five cards that are on the inspiration sheet:


 You will be able to make these five cards plus five more and have goodies left over.....

There are two other kits on the website at the moment:

Cat Themed Card Making Kit


Why not pop over and take a look at what you can make with the other kits.
There will be new kits coming on to the website next week......
 
Back soon, have a great weekend.....
 
Hugs Lisa.B.xxx