Monday, 9 December 2013

End of Year Christmas Craft Party..........

Morning All,
 
Well it is at the moment but by the time I finish this post it will probably be the afternoon!!
 
As promised I thought I would show you some photos from the end of year Lisa.B.Designs Christmas Craft Party.
Thank you to everyone that attended  the class, I think that you will agree that we had a great deal of fun this year and I spoilt you with the food and prizes as usual but I love doing it......
 
With no further ado here are some of the photos....... we start off with the first class of the day, the afternoon crew.....
 
 
All buzzing and starting their projects......
 
It was a lovely festive mood with lots of smiles, mind you I don't think they went much on me singing to the Christmas music!!!........

 
And on the other side of the room........

 
So busy concentrating...... 

 
Some lovely new Christmas stash and inspiration.......


The food was consumed ( I always forget to take a picture of the food!!) and then the games begun.......we played a game that was like pass the parcel but it was pass the wig or hat and I don't think I have ever heard the ladies laugh so much........ 
 
 
All trying to keep their hands on a wig or hat......


Some lovely little pose's going on.....
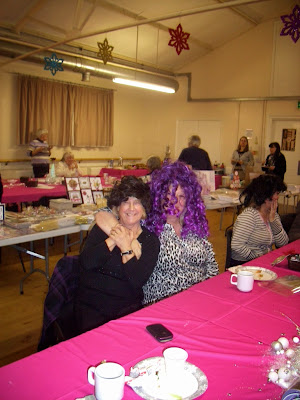

We drew the winner of the yearly Christmas Craft Hamper and the winner was .........

.........Sheila King.........

So well done to Sheila......

 
And then on to the evening class and we do it all over again........
 
 Again they were all eager.......
 

Sarah are we a little camera shy today?

 
The lovely Irene and Pauline and Joyce......


Georgina and Julie, having a great time.....


Now Mal, we can't miss you in that top can we?

 
Carol trying to dodge the camera with my lovely cous' Ang.......

 
As the evening went on the games begun for them and I have to say my god, did they love games......
 
 
All eager and ready for the games to begin......


And we are off.....


Sarah where has that shy side gone now? Give her a wig and a camera and what a difference! lol.......  (apologies for the picture quality but I had to show it!) 

 
And to end the picture show, ahhh the lovely Sandra........I love these two pictures, he, he.......

 
Thank you to everyone that has supported me during 2013 and I wish you all a fantastic Christmas and a Happy and Healthy New Year and look forward to seeing you all in 2014.
 
I will be featuring some of the samples from the class on the blog up to Christmas, so that you can take a closer look....
 
That's about all for now, it has taken me forever to upload all of the photos....
 
Big Hugs Lisa.B.xx


Friday, 6 December 2013

More Vogue...

Good morning everyone

Here is another very quick card made from the 
Craftwork Cards Vogue Collection available HERE
The papers in the collection do all the work 
and are great for Mens cards


I made this in a jiffy by cutting the peacock paper to size, matting and layering
it on to some pearlescent green card from the 
and on to a Craftwork Cards Kraft card blank

I then attached a co-ordinating sentiment from the collection using 
I finished off by applying some Platinum and Icicle Stickles Glitter Glue

I hope you all have time for some crafting this week especially now that we have reached
 that very busy time of year
see you next week

~Suzanne~

Thursday, 5 December 2013

Christmas Angel

 
Hi! It's Georgina with my regular Thursday post.
Today I have a Christmas card to share with you using Hobby House Christmas Angels topper available from Lisa B. Designs. I used two identical toppers for this card. I kept one whole and other I cut the angel and wreath from. I added these to the other topper with foam pads.

 
For the background I cut a panel 135x140mm of pink pearlescent card. This card is part of the Pastel mixed double sided premium pearlescent card pack. I used a Swirls1 embossing folder to emboss a the swirl design. I didn't emboss the whole piece, only the section that fitted inside the embossing folder. I coloured the embossed card with dark red Distress ink and a blending tool.
 
I stamped the sentiment along the edge with Tuxedo Black Memento ink pad. The sentiment stamp is from Hobby Art's Winter Wishes stamp set. I added the embossed panel onto a 148x148mm scallop edge card blank.
 
 
I die cut snowflakes from pink pearlescent card. The dies I used were Ice Crystal 2 and Ice Crystal 3 Joy Crafts cutting dies. I added these and the topper to the card blank. To finish I added various Stickles, gems and faux stitching.


Elisabeth Bell - Christmas AngelsSwirls-1 Embossing folderPastel Mixed Double Sided Premium Pearlescent CardCS059D Winter Wishes
 
Cutting & Embossing - Ice Crystal 2Cutting & Embossing - Ice Crystal 3Memento Ink Pad Tuxedo BlackStraight Edge Card Pack 148 x 148mm - White
           

Wednesday, 4 December 2013

Two more sleeps plus Snowmen......

Morning All,
 
Only two sleeps until the end of year Christmas Party workshop and I am really looking forward to seeing you all and having some fun!
 
We have lots of surprises and fun and games in store for you with lots of prizes.....
I am remarkably organised this year which is making me a little uneasy as I keep thinking that I have forgot something!!!
 
Anyway I thought I would bring you a little inspiration withsome Hobby Art Snowmen. I love snowmen and always enjoy making cards with them and I have to say I love the new Hobby Art designs.......
 
First of all here is Norman and Friends.....
 
 
I stamped Norman on to white card, coloured him with Pro-markers, cut around him leaving a white border and then added some stardust stickles to make him pop. The backing paper and message was from Craftwork Cards Christmas Post.........
 
The next card is Georgie and Robin........

 
I stamped out Georgie on to white card, coloured him with Pro-markers and then stamped his jacket on to co-ordinating paper that I am used on the backing border layers and then paper pieced them on to my stamped image. I finished off by adding some icicle stickles.........
 
The last one is Jasper the Snowman.........
 
This time I made a tent card with an acetate front. I stamped Jasper again on to white card and colored him with Pro-markers. I drew some snow mounds with a black fine liner and then cut around him and the mounds. I attached him to the front of the tent card, added some snowflake paper from my stash to the inside of the card and die cut some tree to go inside and outside.
 I added a Craftwork card message on to a punched single snowflake and border ( Martha Stewart punches from my stash).
Lastly I finished with some icicle stickles and purple gems......

 
Here is a side view.......


Don't forget there is another MEGA SALE at the class on Friday, the last of my stash from my old craft room, anyone is welcome. Please be aware that this will be CASH ONLY for all of these goods 
It is at Fant hall, Barming ME16 8NN from 2.30pm until 9.30pm.
 
Well that is all from me for now, back to the studio to get some more designing for Friday...
 
See you soon....
Hugs Lisa.B.x
 
Norman and FriendsJasper The SnowmanGeorgie & Robin
 
Glitter Glue - StardustGlitter Glue - Icicle  Christmas Post Collection Hobby House Adhesive Rhinestones Purple
..

Tuesday, 3 December 2013

Quick and Easy Glitter Cards


Hello crafters, Kirsten here.
 
 I’ve got two very quick cards to show you. For this first one, I die cut the pale green pearlescent card with the smaller of the Joy Craft snowflake dies, then drew squiggly lines with a glue pen & sprinkled fine glitter on top. When the glitter was dry I attached the card to a piece of lilac glitter card with foam pads.

003

 
I used the pearlescent card as the base for this card. I stamped the snowflake cluster Hobby Art stamp on white card with Versamark & heat set with WOW’s Clear Sparkle embossing powder. I cut scraps of the lilac glitter card & put silver glitter on double sided tape & attached the ribbons with brads to make parcels. I added Icicle distress sickles to the centre of the card candi & die cut snowflakes.
 

002


Butterfly Kisses Snowflake Clear Stamp Set  Pastel Mixed Double Sided Premium Pearlescent Card  Cutting & Embossing - Ice Crystal 2  Glitter Glue - Icicle  WS15 Clear Sparkle 160ml    Quickie Glue Pen


That’s it from me for now, happy crafting.
 
Kirsten.

Sunday, 1 December 2013

December Challenge & November’s Winner

 
Good morning crafters, Kirsten here. It’s time for the final challenge of 2013, all the details are on the challenge page, a big thank you once again to everyone who took part. The winner of the November challenge was chosen by Random.org & it chose….
 
 
011
 
Congratulations to craftyfield! Please contact Lisa at lisabaker1@btinternet.com to get your prize.
 
Now, time for a little honesty. When Lisa chose this month’s challenge topic, I was more than a little trepidatious. I am NOT a fan of glitter. At all. I have no glitter card, apart from a few scraps & the few pots of glitter I have are from way back in the mists of time, when I first started crafting. So please bear with me this month, I’m unlikely to create anything earth-shatteringly fabulous.
 
I stamped the snowflakes from the Hobby Art Butterfly Kisses clear stamp set with distress inks; Chipped Sapphire, Festive Berries & Squeezed Lemonade & heat set them with WOW’s Clear Sparkle EP. I put double-sided tape of two different widths on the 6x6 card blank & covered them with gold glitter. I added doodling & faux stitching with a black fine line pen & embellished with gold distress stickles.

001

The sentiment didn’t stamp as clearly as I’d intended, but I decided it was a happy accident, because I liked the slightly faded appearance.
 
 
Glitter Glue - Gold  Butterfly Kisses Snowflake Clear Stamp Set   WS15 Clear Sparkle 160ml
 
 
And now it’s over to you. Get that glitter out, (if I can do it, anyone can) & enter the challenge. After  all, starting 2014 with £20 to spend on new crafting goodies can only be a good thing.
 
 
That’s it for today, thanks for looking. I’ll be back on Tuesday.
 
Kirsten