Wednesday, 9 August 2017

Card-io Stamps Class Cards.......


Good morning all,

Now I have to apologise as it has been quite a while since I last blogged but with my holiday, my niece's wedding in late July and Kirsten and I really busy planning and making samples for new classes and workshops things have kept me a little bit busy to say the least!!!

But hopefully things have settled down a little now and I can get back to it.......

So today I thought that I would show you the actual class samples that the Card-io Stamps Class was based on last Friday.

For the first one, I kept it simple as there were new ladies that had never used Card-io Stamps before and then we got more involved with the second card.

So the items that I used on this card were as follows:

Card-io Stamps:
Versacolor Inks:


These stamps are an absolute delight to work with Versacolor inks and enable you to get a lovely scene created very quickly. An added bit of scribbling and detail with the Micron fineliners adds ao much to the scene.....


A little closer look.....


This was the other choice for the first card.

The items that I used on this card were as follows:

Card-io Stamps:
Versacolor Inks:


A little closer look at those lovely wellies!


So by now after making their first card they were really into the stamps and enjoying them and it was time to add more detail and create a bigger scene......

The items that I used on this card were as follows:

Card-io Stamps:
Versacolor Inks:


He really is a lovely scarecrow but not very good at his job!


Then the other choice for the second card was this one below, I love the mushrooms.......

The items that I used on this card were as follows:

Card-io Stamps:
Versacolor Inks:


I added a few little dots of Starlights to the centre of the flowers.....


Well I do hope that you have enjoyed having a peruse at the class cards and I will be back next week with some more samples that I made for the class using Card-io Stamps.

Lisa's next workshop at Grove Green will be on Sunday, August 20. Places are still available and all the information is HERE.

Have a great week, love and hugs
Lisa B xxx

Card-io Collection Posh Pots   Card-io Collection Pleasant Pastures   Card-io Collection Perfect Patch   Card-io Collection Backyard Blooms  

Card-io Majestix Bugs & Snails    Card-io Majestix Summer Meadow    Card-io Majestix Basket Blooms  Card-io Collection Say It With Flowers

Versacolor Seashell  Versacolor Camellia   Versacolor Sage  Versacolor Polar Blue  

Versacolor Pink   Versacolor Violet  Versacolor Topaz  Versacolor Brown

Versacolor Cement  Versacolor Charcoal  Versacolor Fresh Green  Versacolor Lime


Archival Inkpad Jet BlackMicron Fineliners Pk of 3


Saturday, 5 August 2017

Polkadoodles Butterfly Swirls

Hi everyone, Julie here, I hope I find you well today?

For today's card I used Polkadoodles stamps and cutting dies and the Crafter's Companion
Regency Swirls 3D embossing folder, so a mix of Lisa's June and July classes.


I cut a piece of super smooth card to the width of the embossing folder and applied Versamark embossing ink to the embossed side of the folder before putting the sandwich through my die cutting machine. I sprinkled the embossed card with WOW! Clear Gloss embossing powder and heat set.


I next applied Spun Sugar Distress Ink with a mini ink applicator, the raised areas with the embossing powder resisted the ink and remained white. I  also cut down silver Mirri card and a coordinating piece of blue card - I used the small script stamp from the Polkadoodles Belle Papillon set to randomly stamp in Spun Sugar Distress Ink at the top and bottom edges of the blue piece of card to add a little  interest - for my matting layers.


I stamped the butterfly from the Belle Papillon set and the flower sprig from the Polkadoodles
 Bella Fleur set twice with Onyx Black Versafine ink, heat setting with clear embossing powder, painting them with watercolours, then die cutting the pieces with the coordinating dies Butterfly 1 and Flower Branch.


I chose the sentiment 'Have a fabulous day' from the Belle Papillion set and stamped and heat set this as well, leaving a bit of room around the edges so I could die cut the stamped piece of card an with a oval cutting  die. I added some dots around the edge of the sentiment with a black Archival Pen to highlight and die cut a scalloped oval just bigger than my sentiment in the leftover Mirri card to mat and layer this onto.


Time to put all the pieces together, with
 a little ribbon and pearls to the spine of the card and Glossy Accents to the centres of the flowers to make them pop............


That completes my project, I hope you like it.

Lisa's next workshop at Grove Green will be on Sunday, August 20. Places are still available and all the information is HERE.

See you next week!

Love, Julie x

Bella Fleur     Belle Papillon   Butterfly 1    Flower Branch    Regency Swirls - 3D Embossing Folder  Spun Sugar - Mini 

Mini Ink Blending ToolVersaMark Ink Pad      VersaFine Ink pad - Onyx Black     Clear Gloss Regular WEP       

Friday, 4 August 2017

Rice Paper Gate Fold Card

Hi there crafters, I hope all is well with you all.

It's a very simple little gate card today and using 2 sheets of the Imagination Crafts Rice papers which are very delicate and give a card that lovely shabby chic look.


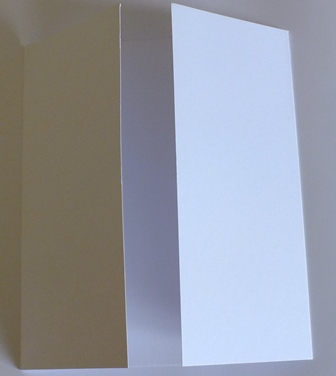
So I took a piece of A4 card and folded to make a gate card then cut the card down to 7.5 inches.


I decided to use No 153 and cover each side of the front of the card using Magi-bond and a small flat paint brush.

 
Next I wanted to decorated the inside of the card and used No 174 and using water and paint brush drew around so as to create a frayed edge for all three surfaces.  I also distressed all the inside edges using Rangers Antique Linen.

 
Next came a piece of square cut card to place in the centre for a written sentiment of your choice.  I used a deckle edge cutter for this to soften the edges.  Then cut a little butterfly from No 153 and glued it to a piece of white card before cutting it out and placing in the corner of the square card.


I also cut out the two large butters from the second sheet of 153 and left them as is as I thought they would look very delicate on the front of the card.  I gave them a little shaping (oops wonky wing :o)


Then decoupaged them onto the front of the card.  I decided to stick the larger mustard coloured butterfly down with 3D foam pads as it was quite large and kept flapping about.


The final flourish was to add some ribbon to tie the card together.  I had a nice piece of cream organza ribbon that I attached to the back of the card then tied a bow at the front to keep the gate card closed.

Here it is again.

 
A very quick and easy card today, but hope you like the Rice Papers as much as I do.
Thank you for dropping by the blog again today.
Hope to see you at the class later.
Love Jan -x-


Thursday, 3 August 2017

A Quick Make: Crafter's Companion Foil Transfers with Rice Paper


Good morning all! Martina here with a quick make for those last minute cards. This is my last post for our current theme, (featuring Imagination Craft's Rice Papers and Crafter's Companion Foils) and the more I have played with the elements the more ideas I have had! I admit when I first came across the foils and transfers it took me back to the days of old and I was a little dubious. The way that they have been made though, makes them very versatile and able to be a subtle addition, or indeed the major part of a card: I'm a convert!

I decided to play with the effects of the foils on different cardstock, so for this make I chose kraft card for my base. I cut a topper panel to the correct size and then cut a sheet from the Delicate Details Transfers Pack in half.


Covering one half of the topper, I used the included lolly stick to rub all over the transfer. I then removed the top carrier sheet and took a length of Rose Gold Foil, placed it over the panel and rubbed all over.


To cover the bottom half of the topper, I used a small section of the Imagination Craft's Rice Paper Design 435 and applied with Magi-bond Decoupage Glue. To cover the join, I found some ribbon from my stash. I struggle to make a perfect bow on my cards so I used an old trick - I tied a narrow ribbon at the place I wanted the bow to be, then tied a 'perfect' bow on a bow-maker.


I stuck the bow onto the join with hot glue and then chose some pins from my stack to add a little bling. The finishing touch was to bring it all together and add a sentiment using the foils and transfers as before. 


There we have it: quick, easy and ready to go!

For those of you attending Lisa's class, I will see you tomorrow!
Happy crafting all,
love
Martina
xxx

Lisa's next workshop at Grove Green will be on Sunday, August 20. Places are still available and all the information is HERE.

Delicate Details - Foil TransfersRose Gold - Foil RollMagibond Decoupage GlueRice Paper Pattern 435

Wednesday, 2 August 2017

August Newsletter

Hi everyone, happy August! I'm sure it was only last week that I sent out the July newsletter..... I hope you're having a good week so far, I took advantage of the sunshine yesterday to sit in the garden and make samples for Friday's Maidstone classes.


The theme for the classes is 'Summer with Card-io' and we'll be using some of the lovely new Card-io clear stamp sets, including Pleasant Pastures and Perfect Patch.............


Quantities of all the new stamp sets are limited, so if you're attending one of Friday's classes and you would like to pre-order, please do so by lunchtime on Thursday, August 3.


Here a few sneak peeks of some of my samples............


I've used the new colours of Versacolor inks, which are really lovely and they blend beautifully.


The September issue of Craft Stamper arrived yesterday, as always it's full of fantastic mixed media stamping projects. This issue has lots of beach- and seaside-themed projects to inspire you...........


All the new items can be found in the What's New section of the website.


For those attending Friday's classes, it would be helpful if you could bring a Jet Black Archival inkpad - I will have some for you to use, but if you have your own it saves you having to wait. The same goes for the Card-io stamp sets; if you already have them, please feel free to bring them for your personal use. 
***Please ensure your items are clearly marked with your name.***


If you would like to join us in Fant Lane Community Hall, Maidstone ME16 8NN on Friday, there a couple of places left in both classes; 2.30 - 5.30pm and 6.30 - 9.30pm. The class fee is £16 and this includes your projects, a tool kit to use during the class and tea/coffee and a slice of cake. Places must be booked in advance; a deposit of £6, or full payment, will secure your place. Please contact me by lunchtime on Thursday August 3; lisabaker1@btinternet.com/01622 675078


In other news, the textiles workshop in Grove Green Community Hall on July 23 was a great success. Everyone really enjoyed using the DecoArt SoSoft Fabric paints with Imagination Crafts'Textile Starlights and Rice Papers. If you'd like to see all the projects, visit the July Workshop album on the Lisa B Designs Facebook page. I think it's a workshop worth repeating next year some time, so if you weren't able to attend this time round, keep an eye on the blog's Workshops' page for updates.


I'm now taking bookings for the next workshop, on August 20 and I'll be announcing details of the September 9 workshop soon.


On Sunday, August 27 I'm taking the mobile shop to the Allington Community Association Family Fun Day, it's a FREE event, with lots to enjoy for all the family and I'm taking the opportunity to have a huge sale to make up for there not being an Extravaganza Day this year. I'll be posting updates on the Lisa B Designs Facebook page in the next few weeks.


That's all the news for now. Have a great August and if you're joining us in Fant Lane Community Hall on Friday, i'm very much looking forward to seeing you.


Hugs,
Lisa B xx